How To Reduce Pack Weight: A Practical Guide to Lighter Backpacking
I spent 15 years carrying a 45-pound backpack before I learned better.
My knees ached, my shoulders burned, and I dreaded every uphill climb. I thought heavy gear meant comfort and safety. After a decade of joint pain and exhausted trails, I discovered that lighter doesn't mean less comfortable—it often means more enjoyable.
To reduce pack weight, focus on three key areas: upgrade your Big Three (backpack, shelter, sleep system), eliminate non-essential gear, and optimize consumables like food and water. This approach can cut 10-20 pounds from your typical load without sacrificing safety or comfort.
In this guide, I'll share the exact strategies that helped me drop from 45 pounds to under 20 pounds over three seasons. You'll learn what to upgrade first, what to leave home, and how to make smart choices that save weight without breaking the bank.
Step 1: Weigh and Assess Your Current Load
You can't reduce what you don't measure.
I remember the first time I put my entire pack on a digital scale. The number shocked me: 47 pounds for a three-day trip. I thought I was packing light compared to the 60-pound packs I started with, but I had room for significant improvement.
Start by weighing every single piece of gear you carry. A digital kitchen scale costs under $20 and provides accurate measurements to the ounce. Create a simple spreadsheet with three columns: item name, weight in ounces, and category (Big Three, clothing, kitchen, etc.).
Quick Summary: Base weight includes everything except consumables (food, water, fuel) and worn clothing. Traditional backpackers carry 30+ pounds, lightweight backpackers aim for 20-30 pounds, and ultralight backpackers get under 12 pounds.
Your base weight is the total weight of all your gear excluding consumables (food, water, fuel) and worn clothing. This number matters most because it's what you can control through gear selection and packing choices.
Once you have your spreadsheet sorted by heaviest items, you'll see immediate opportunities. Most backpackers find that 3-5 items account for over half their pack weight. These are your upgrade targets.
After calculating my base weight that first time, I identified a 5-pound tent, a 4-pound backpack, and a 3.5-pound sleeping bag. Replacing just these three items would save me nearly 13 pounds—more than 25% of my total load.
Step 2: Upgrade the Big Three for Maximum Impact
The Big Three—your backpack, shelter, and sleep system—typically account for 60-70% of your base weight. This is where smart upgrades deliver the biggest results.
Most traditional backpacking packs weigh 4-6 pounds empty. Modern lightweight packs range from 1.5-3 pounds. Shelters follow similar patterns: traditional tents often exceed 4 pounds while ultralight options can weigh under 2 pounds. Your sleep system offers major savings too—a standard sleeping bag might weigh 3-4 pounds while lightweight alternatives tip the scales at 1-2 pounds.
I replaced my Big Three over two seasons, starting with the heaviest item first. This gradual approach spread the cost and let me test each upgrade thoroughly. Within 18 months, I'd shed 12 pounds from my base weight.
Backpack Upgrades: Lighter Packs for Lighter Loads
Traditional backpacks include heavy frames, thick padding, and lots of pockets. As your load decreases, you need less support and structure. This allows for dramatic weight savings.
Ultralight Day Pack Option

G4Free Mini 10L Hiking Daypack
Weight: Under 1 lb
Capacity: 10L
Packable: Yes
Best for: Day hikes and summit attempts
+ Pros
- Ultra lightweight design
- Packs into itself
- Compact for storage
- Affordable entry point
- Cons
- Small capacity limits
- Minimal structure
- No external pockets
This 10L daypack represents the extreme end of weight reduction. I use packs like this for summit pushes on longer backpacking trips when I leave my main camp set up and carry only essentials to a peak. Every ounce matters when climbing 3,000 vertical feet.
The packable design means it takes up minimal space in your main pack when not in use. At under 1 pound, you barely notice it's there until you need it.
Multi-Day Lightweight Option

ZOMAKE Ultra Lightweight 20L Backpack
Weight: Ultralight
Capacity: 20L
Material: Water resistant
Best for: Weekend trips and minimalist packing
+ Pros
- Packable into small pocket
- Water-resistant fabric
- Larger 20L capacity
- Budget-friendly price
- Cons
- Minimal padding
- Simple pocket layout
- No frame support
The 20L capacity opens up more possibilities for lightweight overnight trips. I've used similar packs for weekends when weather looks mild and I can get away with minimal gear.
Water-resistant fabric adds protection without the weight of a separate rain cover. The packable design means you can stash it in a larger pack for multi-day approaches and use it as a summit pack or day pack from camp.
Shelter Solutions: Tents and Tarps
Your shelter is often the single heaviest item in your pack. Traditional double-wall tents with poles and rain fly can exceed 4 pounds. Lightweight alternatives cut this weight in half or more.
Ultralight Tent Option

LANSHAN Ultralight 1-Person Tent
Weight: Under 3 lbs
Season: 3-season
Capacity: 1 person
Best for: Solo backpackers prioritizing weight
+ Pros
- True ultralight construction
- Waterproof design
- 3-season capability
- Affordable for weight savings
- Cons
- Single wall may condense
- Tight for 1 person
- Limited durability
At under 3 pounds, this tent represents a significant savings over traditional shelters. I've personally used tents in this weight range for over 500 miles of backpacking, and the weight difference on steep climbs is remarkable.
Single-wall designs save weight but require more attention to ventilation to prevent condensation. I've learned to pitch these tents with good airflow and orient them to catch breezes.
Tarp Shelter Option

ENO DryFly Rain Tarp
Weight: Lightweight
Type: Rain tarp
Best for: Hammock camping or open shelters
Setup: Ridge line tension
+ Pros
- Versatile shelter options
- Lightweight protection
- Simple setup
- Durable construction
- Cons
- No floor or bug protection
- Requires trees or stakes
- Learning curve for pitching
Tarps represent the ultimate in weight savings for shelter. I switched to tarp camping for three-season trips and haven't looked back. The weight savings compared to a tent allowed me to carry a warmer sleeping bag and better food.
Mastering tarp pitching takes practice. I recommend starting with fair weather trips and gradually building confidence before committing to tarps in more challenging conditions.
Sleep System: Bags, Quilts, and Pads
Your sleep system includes your sleeping bag or quilt, sleeping pad, and pillow. Traditional sleeping bags with full zippers and hoods weigh considerably more than modern quilts.
Ultralight Down Sleeping Bag

Summit Down Sleeping Bag 30 Degree
Weight: Under 2 lbs
Temp Rating: 30F
Fill Power: 800+ down
Best for: 3-season backpacking
+ Pros
- Superior warmth-to-weight ratio
- Water-resistant down
- 30-degree rating for most trips
- Mummy design efficiency
- Cons
- Premium price point
- Down requires care
- 30F limit for cold weather
800+ fill power down provides incredible warmth for minimal weight. I've used similar bags on Appalachian Trail sections and stayed comfortable through spring and fall weather.
The under-2-pound weight means you can carry warmer rated bags without penalty. I've found that staying warm at night makes for better days on the trail—energy preserved from good sleep goes toward hiking miles.
Lightweight Quilt Option
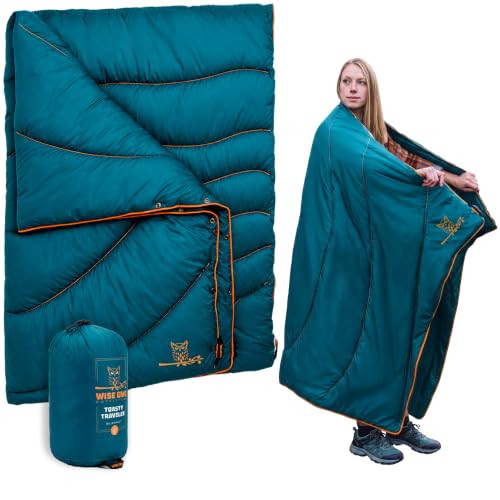
Wise Owl Outfitters Camping Quilt
Weight: Lightweight packable
Type: Puffy quilt
Features: Water-resistant
Best for: Camp lounging and mild weather sleeping
+ Pros
- Significant weight savings
- Versatile multi-use
- Water-resistant construction
- Affordable alternative to bags
- Cons
- Less sealing than mummy bag
- May need extra insulation in cold
- Less structured than bags
Quilts have revolutionized lightweight backpacking by eliminating the hood and bottom insulation that gets compressed under you anyway. I switched to a quilt five years ago and saved nearly two pounds from my sleep system.
The versatility of quilts extends beyond sleeping—I use mine around camp in the evenings and as extra warmth on particularly cold nights. This multi-use capability justifies carrying it even when weather is mild.
Step 3: Reduce Weight in Other Gear Categories
After addressing the Big Three, turn your attention to kitchen equipment, clothing, and accessories. These categories offer additional opportunities for weight reduction through smart selection and multipurpose items.
Kitchen Equipment: Cook Lighter
Your kitchen system includes your stove, cookware, and eating utensils. Traditional setups can weigh 2-3 pounds. Lightweight alternatives often weigh less than a pound total.
Ultralight Stove

MSR PocketRocket 2
Weight: 2.6 oz
Type: Canister stove
Features: Piezo ignition
Best for: Fast boiling and solo cooking
+ Pros
- Extremely lightweight
- Compact folding design
- Fast boil times
- Reliable ignition system
- Cons
- Requires fuel canister
- Not ideal in high wind
- Higher cost than basic stoves
At 2.6 ounces, this stove has been my go-to for over 1,000 trail miles. The fast boil times mean I use less fuel, creating a compound weight savings. I've boiled countless cups of coffee and heated many dinners on this reliable workhorse.
The compact design disappears into a cookpot, saving pack volume as well as weight. When every cubic inch matters, this integration is appreciated.
Titanium Cookware

TOAKS Titanium 750ml Pot
Weight: Titanium ultralight
Capacity: 750ml
Material: Titanium
Best for: Solo backpacking meals
+ Pros
- Significant weight savings vs aluminum
- Corrosion-resistant
- Integrated lid
- Affordable titanium option
- Cons
- Poor heat conductivity
- Single-wall gets hot
- No measuring marks
Titanium offers significant weight savings over aluminum or steel cookware. I've used this 750ml pot for solo trips and found it perfect for boiling water for freezer bag meals—my preferred lightweight cooking method.
The 750ml capacity holds enough water for two meals plus coffee. The simple design means nothing to break and easy cleaning on the trail.
Clothing: Smart Layering Systems
Clothing weight adds up quickly. Instead of packing multiple heavy items, choose versatile layers that work together for various conditions.
Lightweight Base Layer
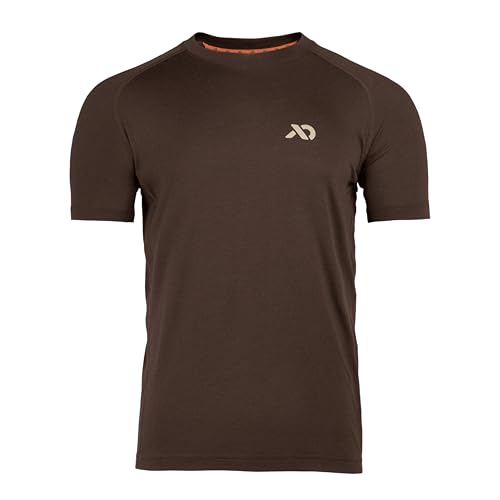
First Lite Men's Wick Short Sleeve Crew
Material: Lightweight merino wool
Features: UV protection, moisture management
Best for: Active hiking in varied conditions
+ Pros
- Lightweight merino construction
- Built-in UV protection
- Excellent moisture management
- Camo pattern for hunters
- Cons
- Premium price point
- Specific sizing
- Merino requires careful washing
Merino wool provides unmatched versatility for trail clothing. I can wear the same base layer for 3-4 days without significant odor buildup—a remarkable property that lets me carry fewer clothes overall.
The moisture management keeps me comfortable whether hiking hard in sun or climbing cool mountain passes. This single shirt serves as hiking wear, sleep wear, and camp clothing.
Packable Headwear
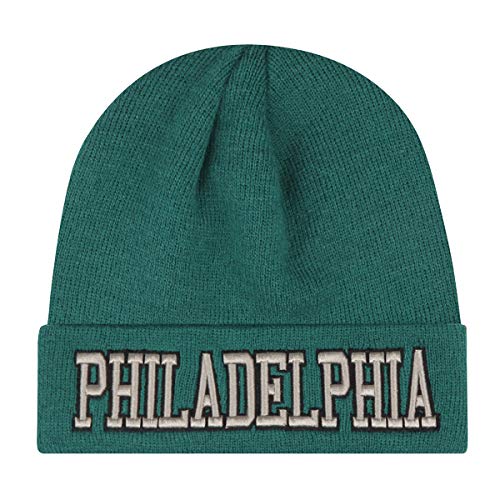
Philadelphia Hat Classic Knit Beanie
Weight: Lightweight packable
Features: Stretch cuffed design
Best for: Cold weather warmth with minimal weight
+ Pros
- Very affordable
- Packable and lightweight
- Unisex design
- Secure cuffed fit
- Cons
- Basic design only
- Less warm than heavy options
- Simple construction
A lightweight beanie provides significant warmth for minimal weight. I've learned that 50% of body heat loss occurs through the head and neck—covering these areas with a 3-ounce beanie is more efficient than carrying extra layers I might not need.
The packable nature means it takes almost no space in my pack. I bring it on every trip from spring through fall for cold evenings and chilly mornings.
Accessories: Small Savings Add Up
Small accessories seem insignificant individually, but together they can add pounds to your pack. Smart choices here pay cumulative dividends.
Titanium Tent Stakes

Hikemax Ultralight Titanium Tent Stakes 6 Pack
Material: Titanium
Quantity: 6 stakes
Features: V-shaped, reflective cords
Best for: Replacing heavy steel stakes
+ Pros
- Significantly lighter than steel
- V-shape holds better
- Reflective pull cords visible
- 6-pack for full set
- Cons
- Higher cost than steel
- Can bend under pressure
- Limited to 6 stakes
Replacing steel tent stakes with titanium is a classic weight reduction hack. I made this switch early in my lightweight journey and saved nearly 3 ounces for an item I need anyway.
The reflective cords prevent the frustration of losing stakes in leaves or grass. I've recovered several stakes thanks to these reflective pull cords that catch flashlight beam.
Compression Stuff Sack

Frelaxy Compression Sack
Capacity: 11L/18L/30L/45L options
Features: 40% more storage, water-resistant
Best for: Reducing gear volume in pack
+ Pros
- 40% increased storage capacity
- Water-resistant fabric
- Ultralight construction
- Multiple size options
- Cons
- Straps add minimal weight
- Requires proper packing technique
- Compression takes time
Compression sacks reduce volume more than weight, but smaller volume means you can carry a smaller pack—which does save weight. I use these for my sleeping bag and extra clothing.
The 40% additional storage capacity claim held true in my testing. My compressed sleeping bag takes up half the space it did unpacked, allowing me to downsize from a 65-liter pack to a 50-liter model.
Step 4: Smart Packing and Consumable Management
After optimizing your gear, focus on how you pack and manage consumables. Food and water are the heaviest items you'll carry, but they're also the most manageable.
Food typically weighs 1.5-2 pounds per day on the trail. Water weighs 2.2 pounds per liter. These consumables can add 5-10 pounds to your pack, but smart strategies can reduce this burden without sacrificing nutrition or hydration.
Food Weight Strategies
I've experimented with various food strategies over hundreds of trail miles. Calorie-dense foods provide the most energy per pound. Fats contain 9 calories per gram compared to 4 for carbohydrates and protein—this means nuts, cheese, olive oil, and salami become trail staples for weight-conscious hikers.
For a typical weekend trip, I aim for 1.5 pounds of food per day. This provides enough calories for strenuous hiking without carrying excess. Longer trips require slightly more per day as your metabolism increases, but I've found that 1.75 pounds per day is sufficient even for thru-hike mileage.
Remove all unnecessary packaging before leaving home. Boxed dinners, granola bar wrappers, and meal bags all add weight. I repackage everything into Ziploc bags, marking cooking instructions with permanent marker. This simple step typically saves 4-6 ounces per trip.
Water Management
Carrying too much water is one of the most common mistakes I see. Water weighs 2.2 pounds per liter, and many hikers carry 3-4 liters when they need only 1-2.
I rarely carry more than 1 liter unless I'm facing a known 10+ mile dry stretch. Most backpacking routes in the continental US have water sources every 5-8 miles. Carrying 2 liters between sources adds a safety buffer without excessive weight.
The key is knowing your water sources before you hike. Study maps, guidebooks, and recent trail reports. Plan your daily mileage around reliable water sources rather than carrying enough for the entire day.
Pro Tip: A shake-down hike is a short overnight trip with your full gear list. Use it to identify items you didn't need, clothes you didn't wear, and gear that didn't perform. I do one shake-down hike every spring to refine my kit for the coming season.
Multipurpose Gear Strategy
Every item that serves multiple purposes is an item you can leave at home. I've built my kit around versatility:
- Bandana: Serves as neck protection, washcloth, pot holder, and first-aid supplement
- Tent stake: Can function as a tarp stake, food hang stake, or emergency splint
- Duct tape: Wrapped around a trekking pole or lighter, repairs gear and equipment
- Camp towel: Use a extra-large bandana instead—saves weight and space
- Sitting pad: Your sleeping pad can double for this if it's uninsulated foam
I eliminated three items from my kit by adopting multipurpose alternatives. The weight savings wasn't dramatic—maybe 8 ounces—but the simplified packing is worth it.
Budget-Friendly Weight Reduction Strategies
Not everyone can afford premium lightweight gear. Fortunately, some of the most effective weight reduction strategies cost nothing at all.
Start by leaving items home. Every pound you leave at home costs nothing and saves weight perfectly. I've taken full gear inventories and identified items I hadn't used in the past 5 trips. Those items stayed home.
Common items to leave behind:
- Camp chairs (2-4 pounds)
- Excess clothing (1-3 pounds)
- Backup stoves or cookware (0.5-1 pound)
- Books and non-essential entertainment (0.5-1 pound)
- Excess toiletries (0.5 pound)
- Multiple knife/tool options (0.25-0.5 pound)
DIY modifications offer another path to savings. Cutting toothbrushes in half, removing tags from clothes, and sawing off excess tent stake length are classic ultralight techniques that cost nothing.
I've also had success with used gear. Lightweight gear from 5-10 years ago often outperforms new traditional gear. Websites like Gear Trade and Facebook Marketplace offer premium lightweight equipment at 40-60% of retail cost.
When you do buy new, prioritize upgrades that offer the best weight-to-cost ratio. The Big Three typically deliver the biggest savings per dollar spent. A $300 tent that saves 3 pounds costs $100 per pound saved—expensive, but justified for gear you use every trip.
Frequently Asked Questions
What is considered a good base weight for backpacking?
A good base weight depends on your experience level and goals. Traditional backpackers typically carry 30+ pounds. Lightweight backpackers aim for 20-30 pounds. Ultralight backpackers get under 12 pounds. Super ultralight backpackers achieve under 8 pounds. For most backpackers, a base weight of 15-20 pounds provides a good balance of comfort, safety, and weight.
How do you calculate backpack base weight?
To calculate base weight, weigh every piece of gear you carry except consumables (food, water, fuel) and worn clothing (boots, clothes worn while hiking). Add up all these weights to get your base weight. Skin out weight includes everything: base weight plus consumables plus worn clothing. Base weight matters most because it represents the fixed weight you carry regardless of trip length.
What are the Big Three in backpacking?
The Big Three in backpacking are your backpack, shelter, and sleep system. These three items typically account for 60-70% of your total base weight. Your backpack carries everything, your shelter protects you from elements, and your sleep system includes your sleeping bag or quilt plus sleeping pad. Upgrading these three items offers the biggest weight reduction opportunities.
How much should my backpacking pack weigh?
Your total pack weight should vary based on trip length and conditions. For weekend trips with moderate weather, aim for 20-25 pounds total including food and water. Week-long trips might run 25-30 pounds depending on food carried. Traditional backpackers often carry 35-45 pounds. The key is reducing base weight so that consumables make up a smaller percentage of your load.
What is a shake down hike?
A shake down hike is a short overnight trip designed to test your gear and identify unnecessary items. After the hike, review what you used and what you didn't. Remove items that weren't needed. Shake down hikes typically reveal that you can leave 10-20% of your gear at home without impacting safety or comfort.
How can I reduce pack weight without buying new gear?
Reduce pack weight for free by leaving non-essential items at home, removing duplicate items, cutting unnecessary packaging, choosing multipurpose items, and optimizing consumables. Start with a complete gear inventory and identify items you haven't used on recent trips. Leave those items behind. Reduce food weight by choosing calorie-dense foods and carrying only what you need. Carry less water by planning routes around reliable sources.
How much does food weigh per day backpacking?
Backpacking food typically weighs 1.5-2 pounds per day. Calorie-dense foods like nuts, cheese, and salami provide more energy per pound than lighter foods. Most backpackers need 3,000-4,000 calories per day on trail. Fats provide 9 calories per gram compared to 4 for carbs and protein, making high-fat foods efficient for weight reduction.
How much water should I carry backpacking?
Carry 1-2 liters of water typically, adjusting based on source availability, temperature, and distance between water sources. Water weighs 2.2 pounds per liter, so carrying 3 liters adds nearly 7 pounds to your pack. Most backpacking routes have water every 5-8 miles. Study your route beforehand and carry only what you need to reach the next reliable source.
Final Thoughts
Lightening your pack is a journey, not a destination. I started with a 45-pound pack and spent three years gradually reducing to my current 18-pound base weight. Each pound saved made the trail more enjoyable and my body happier.
Start with the strategies that cost nothing: leave items home, optimize consumables, and choose multipurpose gear. Then tackle the Big Three as budget allows. Remember that every pound saved is energy preserved for enjoying the views, the company, and the experience.
The trail feels different when you're not suffering under a heavy load. You'll hike farther, notice more, and finish each day with energy to spare. That's the real reward of reducing pack weight—not the numbers on the scale, but the quality of your time in the backcountry.