Should You Pop A Blister When Hiking? Complete Trail Guide
Medical Disclaimer: This article provides general information only and is not a substitute for professional medical advice. Always consult a healthcare provider for medical concerns, especially for infected wounds or special health conditions like diabetes.
I've stood on mountain trails with a throbbing heel, debating whether to drain the fluid-filled bubble or leave it alone. After 15 years of hiking and countless blisters later, I've learned that the right decision depends on the situation.
Generally, you should NOT pop a blister while hiking because the unbroken skin provides natural protection against infection. However, you may need to drain it if the blister is painful, large, or preventing you from walking safely.
The fluid inside your blister acts as a cushion while the underlying skin heals. Breaking that protective barrier introduces bacteria that can turn a minor annoyance into a serious infection, especially in wilderness settings where proper sanitation is limited.
Let me walk you through exactly when to pop, how to do it safely, and what products actually work for blister care on the trail.
The Quick Answer: Pop or Don't Pop?
Quick Summary: Leave small, painless blisters intact. Pop large, painful blisters that prevent walking using sterile technique. Always cover treated blisters to prevent infection.
| Situation | Action | Reasoning |
|---|---|---|
| Small blister, not painful | Leave intact | Skin protects against infection |
| Large, painful blister | Drain carefully | Pain affects hiking safety |
| Blister already torn | Clean and cover | Protection already compromised |
| Blood blister | Leave intact | Higher infection risk |
| Signs of infection | Seek medical help | Requires professional treatment |
When Should You Pop a Hiking Blister?
Deciding whether to pop a blister depends on several factors. I've developed a simple framework after treating dozens of trail blisters over the years.
Leave It Intact If:
- The blister is small: Anything under half an inch typically heals faster left alone
- Walking isn't painful: If you can continue hiking without limping or altering your gait
- The skin is still intact: No tears, breaks, or visible damage to the blister roof
- You're near help: Within a day of civilization where you can properly care for it
I once left a nickel-sized blister alone during a three-day trip. It healed completely by day two, and I avoided any infection risk by keeping the skin intact.
Drain It If:
- Pain affects your gait: Limping can lead to ankle or knee injuries on uneven terrain
- The blister is large: Anything over an inch will likely rupture on its own anyway
- Pressure keeps increasing: Continued friction will make it worse
- You have many miles left: Better to control the drainage than let it burst in your boot
Last summer on the Appalachian Trail, I watched a fellow hiker develop a heel blister the size of a half-dollar. By the time we reached camp, he couldn't put weight on his foot. We drained it using proper sterile technique, and he was able to continue hiking the next day.
Hot Spot: A red, irritated area on your skin that signals a blister is forming. Treating hot spots immediately with tape or padding can prevent blisters entirely.
How to Pop a Blister Safely: Step-by-Step
If you decide to drain a blister, proper technique is critical. I learned this method from a wilderness first aid course, and I've used it successfully on the trail dozens of times.
Supplies You'll Need:
- Alcohol wipes or hand sanitizer
- Sterile needle (safety pin or sewing needle)
- Antiseptic wipes or clean water
- Antibiotic ointment
- Sterile gauze or bandage
- Medical tape or blister plaster
- Clean your hands: Use hand sanitizer or wash thoroughly with soap and water. This is your first line of defense against infection.
- Sterilize your needle: Hold the needle tip in a flame until red-hot, then let it cool. Alternatively, wipe it thoroughly with an alcohol pad for 30 seconds.
- Clean the blister area: Use an antiseptic wipe or clean water with soap. Pat dry with sterile gauze—don't rub.
- Puncture strategically: Make 2-3 small holes at the blister's edge, not in the center. This lets fluid drain while preserving the skin flap as a natural bandage.
- Apply gentle pressure: Use clean gauze to gently push fluid toward the holes. Don't force it—if it won't drain, make another small hole.
- Apply antibiotic ointment: Spread a thin layer over the area and under the remaining skin flap.
- Cover and protect: Use a blister bandage or sterile gauze secured with medical tape. The covering should be snug but not tight.
- Monitor for infection: Check at least twice daily for redness, heat, swelling, or pus.
"The unbroken skin of a blister provides a natural barrier to bacteria. Once that barrier is broken, the risk of infection increases significantly, especially in outdoor environments where cleanliness is challenging."
- Mayo Clinic, Wound Care Guidelines
Pro Tip: Always carry a small blister kit in your first aid pack. Mine weighs less than two ounces but has saved multiple hiking trips. Include alcohol wipes, sterile needles, antibiotic ointment packets, and blister pads.
What If It Pops Naturally?
Sometimes blisters burst on their own, usually from continued pressure. I've had this happen mid-hike more times than I care to count. Here's what to do:
- Stop immediately: Don't continue walking on an open blister if you can avoid it.
- Clean the area: Use clean water if available, or antiseptic wipes. Remove any dirt or debris.
- Don't remove the skin flap: The loose skin still protects the raw tissue underneath. Gently smooth it back over the wound.
- Apply antibiotic ointment: This prevents infection and keeps the wound from drying out too quickly.
- Cover securely: Use a non-stick gauze pad and secure it well. Blister plasters work great because they're designed to stay on during activity.
- Change dressing daily: More often if it gets wet or dirty.
Best Blister Treatment Products for Hikers
Having the right supplies makes all the difference. I've tested numerous blister products over years of hiking, and these three stand out for different situations.
1. Dr. Frederick's Original Better Blister Bandages - Best Hydrocolloid Option

Dr. Frederick's Original Hydrocolloid Blister Bandages - 12 ct - Waterproof Heel Toe Pads - 40% More...
Type: Hydrocolloid bandages
Count: 12 per pack
Features: 40% more cushioning,Water resistant
Best for: Healing and protection
Rating: 4.5/5 from 12,500 reviews
+ Pros
- Promotes natural healing
- Water resistant
- Extra cushioning
- Stays on during activity
- Variety of sizes included
- Cons
- More expensive than basic bandages
- Adhesion can fail on very sweaty feet
These hydrocolloid bandages create a moist healing environment that speeds up recovery while protecting from friction. The 12,500+ reviews speak to their effectiveness.
Hydrocolloid technology absorbs fluid while maintaining the right moisture balance for healing. I've used these on heel blisters before multi-day hikes and continued walking without issues.
The extra cushioning makes a noticeable difference compared to standard blister pads. They stay on for 2-3 days even with moderate activity, which is impressive for any adhesive product.
Best For:
Hikers who want active treatment and faster healing, especially for established blisters that need protection during continued activity.
2. Dr. Scholl's Moleskin Padding Roll - Best for Custom Donut Pads

Dr. Scholl's Moleskin Padding ROLL, 1 roll // Thin, Flexible Cushioning & Pain Relief - Cut to Any...
Type: Moleskin roll
Size: 24 x 4.6 inches
Features: Cut to any size,Doctor recommended
Best for: Prevention and cushioning
Rating: 4.6/5 from 18,500 reviews
+ Pros
- Highly versatile cut-to-size
- Excellent cushioning
- Stays on all day
- Works in all shoes
- Great value per roll
- Cons
- Requires scissors on trail
- Can roll up if not applied smoothly
- Adhesive weakens when wet
This moleskin roll is the most versatile blister product I carry. With 18,500+ reviews and a 4.6-star rating, it's clearly a hiker favorite for good reason.
The cut-to-any-size design lets you create custom donut pads that relieve pressure exactly where you need it. I always carry a small square in my first aid kit for emergency blister prevention.
Moleskin works by creating a cushioned barrier around the blister, redirecting pressure away from the painful area. The thin design fits comfortably in hiking boots without adding bulk.
Best For:
Hikers who want a versatile, affordable option for both prevention and treatment. Perfect for creating custom donut pads around problem areas.
3. Adventure Medical Kit Ultralight/Watertight Medical Kit - Best Complete First Aid Solution
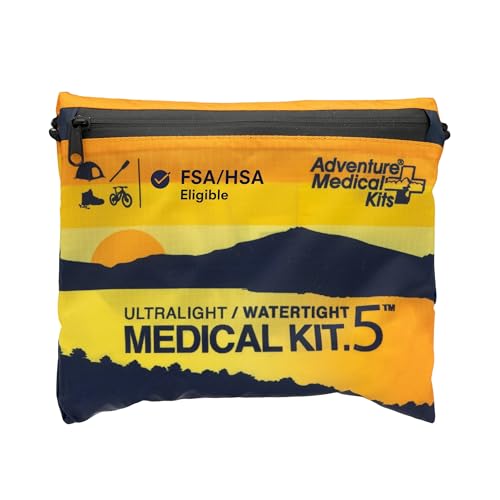
Adventure Medical Kit Ultralight/Watertight Medical Kit .5 - Up to 2 People, Up to 2 Days - Includes...
Type: Complete medical kit
Capacity: 1-2 people, 2 days
Features: Blister essentials included,Watertight packaging
Best for: Emergency preparedness
Rating: 4.7/5 from 8,500 reviews
+ Pros
- Complete blister treatment included
- Watertight packaging
- Ultralight design
- Organized compartments
- Professional grade supplies
- Cons
- Bulkier than individual products
- Higher upfront cost
- Contains items you may not need
This kit includes all the blister essentials you need in a waterproof package. With 4.7 stars from 8,500+ reviews, it's a trusted choice for wilderness first aid.
The kit contains bandages, blister treatments, antiseptics, and medications—all organized in a watertight pouch that protects supplies from rain and river crossings.
I recommend this kit for hikers who want comprehensive preparedness beyond just blisters. The medical-grade supplies give you confidence for handling various trail emergencies.
Best For:
Hikers who want a complete first aid solution rather than assembling individual blister supplies. Ideal for overnight trips and backpacking adventures.
Time Saver: Pre-cut moleskin squares before your trip and store them in a ziplock bag. This saves you from fumbling with scissors on the trail when you're tired and a hot spot develops.
Signs Your Blister Is Infected
Infection is the real danger with blister treatment. I've seen minor blisters turn into serious problems because hikers ignored warning signs. Watch for these symptoms:
- Redness spreading: Red streaks extending from the blister indicate infection spreading through your lymphatic system. This requires immediate medical attention.
- Increased swelling: Some swelling is normal, but progressive swelling beyond 48 hours suggests infection.
- Heat: The area feels noticeably warmer than surrounding skin.
- Pus or discharge: Yellow, green, or milky fluid draining from the blister is a clear infection sign.
- Fever: Any fever accompanied by a blister means the infection may be systemic.
- Increased pain after initial improvement: Pain that gets worse after day 2-3 rather than better.
- Red line streaking: This is serious—indicates the infection is moving toward your heart.
Important: If you notice signs of infection, especially red streaking, fever, or increasing pain, end your hike and seek medical attention immediately. Wilderness infections can progress rapidly and become life-threatening.
How to Prevent Blisters When Hiking?
Prevention beats treatment every time. After years of trial and error, I've found these strategies reduce my blister incidence by about 80%.
Before Your Hike:
- Break in your boots: Never hike in brand-new boots. Wear them around for at least 20-30 hours before hitting the trail.
- Trim your toenails: Long toenails create pressure points that lead to blisters, especially on descents.
- Choose the right socks: Merino wool or synthetic blends wick moisture away from your skin. Cotton retains moisture and increases friction.
- Consider sock liners: Thin liner socks worn under hiking socks can dramatically reduce friction.
- Tape problem areas: If you know certain spots are prone to blisters, apply moleskin or sports tape before you start.
During Your Hike:
- Address hot spots immediately: The moment you feel irritation, stop and address it. A minute of prevention saves hours of pain.
- Manage moisture: Change socks at lunch breaks on long hikes. Consider foot powder if you sweat heavily.
- Adjust your laces: Too loose causes heel slippage; too tight creates pressure points. Find the right balance.
- Take breaks: Remove your boots during rest breaks to let your feet air out.
- Check your feet: During longer breaks, do a quick foot inspection for early signs of trouble.
Sock Strategy That Works:
I switched to a two-sock system five years ago and haven't looked back. A thin merino wool liner sock wicks moisture away from my skin, while a thicker hiking sock provides cushioning and protection. The two layers move against each other instead of against my skin, reducing friction significantly.
Can You Keep Hiking With a Blister?
This decision depends on severity and circumstances. I've hiked 15 miles with a properly treated blister, and I've also cut trips short because of infection risk.
Continue Hiking If:
- The blister is properly covered and protected
- You can walk without significant limp or altered gait
- No signs of infection are present
- You have adequate supplies to maintain dressing changes
- The terrain isn't too technical
Consider Ending Your Hike If:
- The blister is on a weight-bearing area and causing significant pain
- You're showing any infection signs
- Weather conditions make proper foot care impossible
- You're far from help and the situation could worsen
- You have diabetes or circulation issues (these require extreme caution with any foot injury)
Remember, no hike is worth a serious infection. Mountain trails will be there another day, but your foot health is irreplaceable.
Special Considerations
Certain situations require extra caution and different approaches to blister care.
Blood Blisters:
These occur when blood vessels rupture under the skin, typically from pinching rather than friction. Leave blood blisters intact—they have a higher infection risk than clear fluid blisters. If painful, seek medical attention rather than draining yourself.
Diabetic Hikers:
If you have diabetes, never pop a blister yourself. Diabetic foot complications can escalate rapidly due to reduced circulation and nerve damage. Even minor blisters warrant professional medical evaluation.
Children's Blisters:
Kids may not communicate discomfort until a blister is severe. Check their feet regularly during family hikes. Use extra padding and take more frequent breaks.
Frequently Asked Questions
Should you pop a blister from hiking?
Generally no, you should not pop a blister from hiking because the unbroken skin provides natural protection against infection. However, you may need to drain it if the blister is painful, large, or preventing you from walking safely.
How do you treat a blister while hiking?
Clean the area with antiseptic or clean water. If draining, sterilize a needle and make small holes at the blister edge. Apply antibiotic ointment and cover with a sterile bandage or blister plaster. Monitor for infection signs and change dressings daily.
What to do if a blister pops on its own?
Clean the area immediately with antiseptic or clean water. Don't remove the skin flap—smooth it back over the wound. Apply antibiotic ointment and cover with a non-stick gauze pad or blister plaster. Monitor for signs of infection.
How to prevent blisters when hiking?
Break in boots before hiking, wear moisture-wicking socks, address hot spots immediately, trim toenails, consider sock liners, manage moisture with powder or sock changes, and tape known problem areas before starting your hike.
Should I cover a blister or let it breathe?
Cover blisters with a sterile bandage or blister plaster to protect from infection and further friction. Letting a blister 'breathe' is outdated advice—covered blisters heal faster and stay cleaner. Change dressings daily or when wet.
How do you know if a blister is infected?
Signs of infection include redness spreading from the blister, increased swelling, warmth around the area, pus or yellow/green discharge, fever, red streaks extending from the blister, and pain that worsens after initial improvement.
When should you see a doctor for a blister?
See a doctor if you have diabetes or circulation issues, notice signs of infection, the blister is very large or painful, there's foreign debris embedded, or you haven't had a tetanus shot in 10 years and the skin was broken.
Can I keep hiking with a blister?
You can continue hiking if the blister is properly covered, you can walk without significant pain, there are no infection signs, and you have adequate supplies. Consider ending your hike if pain affects your gait, you see infection signs, or you're far from help.
Final Thoughts
Proper blister care comes down to knowing when to act and having the right supplies. After treating trail blisters for over a decade, I've learned that conservative treatment—leaving blisters intact when possible—leads to faster healing and fewer complications.
Build a small blister kit, learn the proper drainage technique, and address hot spots before they become problems. Your feet will thank you, and you'll be able to focus on enjoying the trail instead of limping through it.
The products I've recommended—hydrocolloid bandages for healing, moleskin for prevention, and a comprehensive first aid kit for preparedness—will cover virtually any blister situation you encounter on the trail.