How To Sleep In A Sleeping Bag: Complete Comfort Guide
I've spent over 100 nights sleeping in sleeping bags across four seasons, from summer car camping to winter backpacking trips. The first night I ever camped, I shivered until 3 AM because I didn't know how to actually use my sleeping bag properly.
After years of trial and error, I learned that sleeping comfortably isn't just about buying expensive gear. The difference between a miserable night and restful sleep comes down to a few simple techniques anyone can learn.
To sleep comfortably in a sleeping bag, choose the right temperature rating for your conditions, use a sleeping pad for ground insulation, wear moisture-wicking base layers, properly adjust the hood and draft collar, and manage ventilation to prevent condensation buildup.
In this guide, I'll share the exact step-by-step process I use to get a good night's sleep outdoors, along with the gear upgrades that made the biggest difference in my comfort level.
What You Need for Comfortable Sleep?
Before diving into techniques, let's cover the essential gear that makes sleeping in a bag actually enjoyable. I've tested dozens of combinations, and some items are non-negotiable.
Temperature Rating: The manufacturer's indication of the lowest temperature at which a sleeping bag will keep you warm. Look for EN/ISO rated bags which show both a "comfort" rating (for cold sleepers) and "lower limit" rating (for warm sleepers).
The most critical piece of gear that beginners often overlook is a quality sleeping pad. Your sleeping bag's insulation compresses underneath you, losing all warming ability. Without a pad, the ground steals heat through conduction all night long.
R-Value: A measure of a sleeping pad's insulation ability. Higher numbers mean more warmth. Summer camping requires R-1 to R-2, three-season needs R-3 to R-4, and winter camping demands R-5 or higher.
I learned this lesson the hard way on a spring camping trip when temperatures dropped to 35F. Despite having a 20F sleeping bag, I froze all night because I was using a thin foam pad with minimal insulation.
Step-by-Step: How to Sleep Comfortably in Your Sleeping Bag
Follow these steps in order for the best chance at restful sleep outdoors. I've refined this routine through dozens of camping trips.
- Choose the Right Bag: Match temperature rating to expected conditions with a 10-15F buffer. If lows might hit 40F, bring a 25-30F bag rather than a 40F bag. It's easier to vent a warm bag than warm up a cold one.
- Prepare Your Sleep Site: Clear the ground of rocks, sticks, and debris. Lay out your tent footprint or ground cloth first, then position your sleeping pad. I always give my pad a few minutes to fully inflate if using air.
- Pre-Warm Your Bag: About 30 minutes before bed, I fluff my sleeping bag vigorously to restore loft. If I have a hot water bottle, I place it in the footbox. This pre-warming makes entering the bag much more comfortable.
- Layer Appropriately: Wear clean, moisture-wicking base layers (top and bottom). Avoid cotton entirely. For cold nights, add a mid-layer like fleece. In mild weather, sleep in lightweight base layers or just underwear.
- Use a Liner for Warmth: A sleeping bag liner adds 5-15F of warmth depending on material. Liners also keep your bag clean, reducing how often you need to wash it. I use a microfiber liner for three-season trips.
- Enter the Bag Efficiently: Zip the bag fully open, sit at the opening, and slide your legs in first. Then lie back and pull the bag over your shoulders. Zip from bottom to top to prevent fabric snagging.
- Adjust the Hood: Pull the hood until it frames your face comfortably. Drawstring should be snug but not tight. Leave nose and mouth exposed for breathing. A properly adjusted hood makes a huge difference in warmth.
- Seal the Draft Collar: Many mummy bags have a draft collar near the neck. Pull this over your shoulders and adjust until no cold air can enter. This is often the difference between staying warm and getting cold.
- Manage Ventilation: If you feel too warm, unzip the bag slightly rather than opening fully. Start with a 6-inch opening near your feet. This prevents sweating while maintaining core warmth.
- Find Your Position: Side sleepers should place a small pillow or stuff sack between their knees. Back sleepers benefit from a pad under their knees. Stomach sleepers may prefer a rectangular bag for more foot room.
Gear That Makes Sleeping Better
While technique matters, having the right accessories transforms your sleeping experience. These three products made the biggest difference in my camping comfort.
Sleeping Bag Liner - The Friendly Swede

The Friendly Swede Sleeping Bag Liner - Adult Sleep Sack with Pillow Pocket, Lightweight Travel...
Material:Microfiber cotton feel
Warmth Boost:5-15F
Features:Full length zipper,Stuff sack included
+ Pros
- Adds significant warmth
- Keeps bag clean
- Soft comfortable feel
- Full zipper for easy exit
- Cons
- Adds bulk to pack
- None significant
A quality sleeping bag liner serves two purposes: it adds warmth and keeps your bag clean. After a muddy backpacking trip, I learned the value of liners when I had to wash my entire sleeping bag. Now I always use a liner to extend the time between washes.
The microfiber material feels soft against skin, much nicer than the slick nylon interior of most sleeping bags. I've noticed liners add about 10F of warmth, which lets me use my 30F bag into the low 40s comfortably.
Who Should Buy?
Anyone camping in temperatures near their bag's lower limit, backpackers who want to extend their bag's range, or campers who want to reduce washing frequency.
Who Should Avoid?
Ultralight backpackers counting every ounce, or summer-only campers who never need extra warmth.
Sleeping Pad - FUN PAC Camping Sleeping Pad
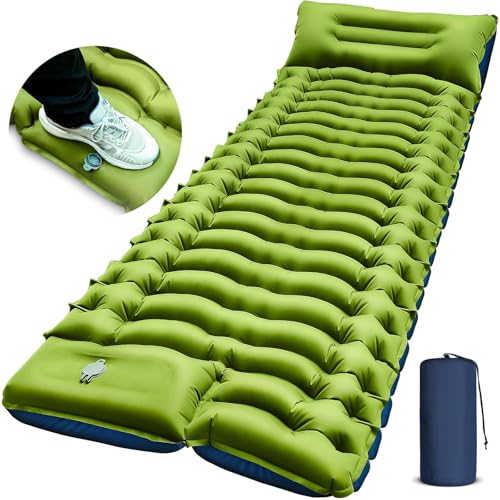
FUN PAC Camping Sleeping Pad, Ultralight Camping Mat with Pillow, Built-in Foot Pump Inflatable...
Type:Inflatable with built-in pump
Features:Integrated pillow,Foot pump,Compact design
+ Pros
- Built-in pillow saves weight
- Foot pump works well
- Compact when packed
- Good insulation value
- Cons
- Can be noisy when moving
- Potential for punctures
A sleeping pad is non-negotiable for outdoor sleep comfort. Without ground insulation, your body heat conducts into the earth all night. I've slept in 0F bags on thin pads and frozen, while 30F bags on thick pads kept me warm.
This pad's built-in pillow is a clever feature I've come to appreciate. It saves having to pack a separate pillow, and the elevation helps with neck alignment. The foot pump design beats having to inflate by lung power after a long day of hiking.
Who Should Buy?
Backpackers wanting an all-in-one sleep solution, campers who value convenience, or anyone who hates carrying a separate pillow.
Who Should Avoid?
Side sleepers needing extra cushioning (this pad is relatively thin), or campers who prioritize absolute minimal weight over comfort.
Camping Pillow - TETON Sports Camp Pillow

TETON Sports Camp Pillow; Great for Travel, Camping and Backpacking; Washable, Black
Type:Compressible foam
Features:Washable cover,Compact design,Multi-use for travel
+ Pros
- Soft and comfortable
- Washable cover
- Compresses small
- Durable construction
- Cons
- Less support than inflatable
- Bulkier when packed
I spent my first 20 camping nights using a stuff sack filled with clothes as a pillow. It worked, but I constantly woke up with neck pain. Switching to a real camping pillow was a game-changer for my sleep quality.
This compressible pillow feels similar to a bed pillow, which helps with sleep quality when you're already adjusting to being outdoors. The washable cover is essential after multiple trips, and I appreciate that it compresses down reasonably well for packing.
Who Should Buy?
Car campers with space for comfort gear, anyone with neck issues needing proper support, or campers who prioritize sleep quality over minimal packing.
Who Should Avoid?
Ultralight backpackers on multi-day trips, or anyone trying to minimize pack volume at all costs.
Temperature Management: Staying Warm Without Overheating
Getting the temperature right inside your sleeping bag is an art. I've been too cold and too hot, and both ruin sleep quality. Here's how to find the sweet spot.
Cold Weather Techniques
When temperatures drop below your bag's comfort rating, these techniques help extend its range. On a 25F night with my 30F bag, these tricks kept me warm enough to sleep well.
- Wear a hat: Significant heat loss occurs through your head. A beanie makes a noticeable difference in warmth. I keep a lightweight wool hat specifically for sleeping.
- Use a hot water bottle: Fill a Nalgene with hot water and place it in the footbox. This pre-warms the bag and keeps feet warm all night. Just make sure the lid is tight.
- Eat before bed: Digestion generates body heat. A high-calorie snack 30 minutes before bed helps maintain warmth through the night. I eat a handful of nuts or a protein bar.
- Keep clothes warm: Change into your sleeping clothes inside your bag if it's already warm out. This prevents shocking your body with cold fabric.
Warm Weather Ventilation
Summer camping presents the opposite problem. I've sweated through my base layers in 60F weather by overdressing. Proper ventilation is key.
- Zip from the bottom: Opening the foot zipper allows cool air in without exposing your upper body. This is often all the ventilation you need.
- Use the bag as a blanket: In warm weather, lie on top of the bag and use it as a quilt. This provides coverage without trapping heat.
- Choose the right bag: Summer bags with 50F+ ratings use less insulation and breathe better. Using a 20F bag in summer is miserable.
Should You Sleep Naked?
This is a common myth I used to believe. The idea is that body heat transfers more efficiently to the bag without clothes. In reality, wearing appropriate base layers is warmer than sleeping naked.
Base layers trap warm air against your skin and wick moisture away. Sleeping naked means your sweat stays against your skin, making you cold. The only exception is if your clothes are damp from the day. In that case, change into dry base layers rather than sleeping naked.
Women-Specific Cold Spot Prevention
Women often experience cold spots at the hips and feet that men don't notice. This is due to different body composition and circulation patterns. My camping partner learned to address these specific issues:
- Extra foot insulation: Wear clean wool socks to bed. If feet still get cold, place a small piece of closed-cell foam under the footbox of your bag.
- Hip insulation: Side sleeping women often compress insulation at the hips. A wider-cut mummy bag or a rectangular bag helps. Some women prefer "women's specific" bags with extra insulation at the hips and feet.
- Layer at core: A vest or extra mid-layer at the torso helps maintain core temperature, which improves circulation to extremities.
Side Sleeper, Back Sleeper, Stomach Sleeper
Your sleep position affects how comfortable you'll be in a sleeping bag. Most bags are designed for back sleeping, but side sleepers make up about 60% of the population.
For Side Sleepers
Side sleeping in a mummy bag can feel constricted. Your knees press together, and your shoulders compress the bag's insulation. After years of uncomfortable side sleeping, I found these solutions:
- Place a small pillow or stuff sack between your knees. This aligns your hips and reduces pressure.
- Choose a bag with a "mummy cut" that's not too narrow. Some brands offer "relaxed mummy" shapes.
- Consider a semi-rectangular bag if you primarily sleep on your side.
- Use a wider sleeping pad that allows you to shift positions without falling off.
For Back Sleepers
Back sleepers have it easiest with most sleeping bags. The mummy shape aligns well with back sleeping posture. However, back sleepers should:
- Place a small pillow or rolled jacket under the knees to reduce lower back strain.
- Ensure the hood doesn't force your chin to your chest. Adjust the drawstring for proper neck alignment.
- Use a pad with appropriate cushioning, as your hips and shoulders will press into the ground.
For Stomach Sleepers
Stomach sleeping in a mummy bag is challenging. The hood design isn't meant for face-down sleeping. Options include:
- Choose a rectangular bag that allows you to turn your head freely.
- Use a quilt instead of a traditional bag for more freedom of movement.
- Consider a zipperless design that opens fully like a blanket.
Common Sleeping Bag Mistakes to Avoid
I've made most of these mistakes myself over the years. Learning from them saved me from many uncomfortable nights.
| Mistake | Why It's a Problem | The Fix |
|---|---|---|
| Using bag without pad | Ground steals heat through conduction | Always use a sleeping pad with appropriate R-value |
| Wearing too many clothes | Sweat accumulates, making you cold | Wear minimal base layers, add only if shivering |
| Burying face in bag | Moisture from breath dampens insulation | Keep nose and mouth exposed |
| Storing bag compressed | Insulation loses loft over time | Store loose in large cotton sack |
| Wrong temperature rating | Too cold or too hot for conditions | Choose bag with 10-15F buffer below expected lows |
| Not fluffing before use | Compressed insulation can't loft properly | Shake bag vigorously before each use |
Pro Tip: The most common cause of cold sleepers is actually overdressing. When you wear too many clothes, you sweat even without realizing it. That moisture then makes you cold later. Start with minimal layers and only add more if you're shivering.
Understanding Sleeping Bag Insulation and Loft
The warming ability of your sleeping bag comes from loft - the fluffy air pockets that trap heat. When loft is compromised, warmth drops dramatically.
Loft: The thickness and fluffiness of insulation material. Higher loft means more air trapped and more warmth. Down is measured in "fill power" - 600 fill power is good, 800+ is premium.
Your sleeping bag loses warmth over time as insulation degrades. Down bags can last 10+ years with proper care, while synthetic typically lasts 3-5 years. I'm still using a down bag I bought eight years ago, and it retains about 85% of its original warmth.
Proper storage is critical for maintaining loft. Never leave your bag compressed in its stuff sack for extended periods. Store it loosely in a large mesh or cotton sack where the insulation can fully expand.
Frequently Asked Questions
How do you sleep comfortably in a sleeping bag?
Sleep comfortably by choosing a bag with appropriate temperature rating, using a sleeping pad for ground insulation, wearing moisture-wicking base layers, properly adjusting the hood and draft collar, and managing ventilation to prevent overheating.
Should you wear clothes in a sleeping bag?
Yes, wearing clean, moisture-wicking base layers keeps you warmer than sleeping naked. Avoid cotton entirely. In mild weather, lightweight base layers or underwear work well. In cold weather, add a mid-layer but don't overdress to the point of sweating.
Why do my legs get cold in my sleeping bag?
Cold legs typically result from insufficient ground insulation under your lower body, compression of bag insulation when lying on your side, or poor circulation. Solutions include ensuring your sleeping pad extends under your entire body, placing extra insulation under your legs, and wearing loose base layers that don't restrict blood flow.
Is it better to sleep naked in a sleeping bag?
No, sleeping naked is generally colder than wearing appropriate base layers. Base layers trap warm air against your skin and wick away moisture. The only exception is if your sleeping clothes are damp, in which case you should change into dry base layers rather than sleep naked.
How do I stop my sleeping bag from sliding?
Prevent sliding by using a sleeping pad with a textured non-slip surface, placing your tent on level ground rather than a slope, and ensuring the pad is centered in the tent. Some pads feature anti-slip coatings specifically designed to stay in place on tent floors.
Can you put a blanket inside a sleeping bag?
Yes, adding a blanket inside your sleeping bag can provide extra warmth in cold conditions. However, be cautious not to compress the bag's insulation with the blanket's weight. For best results, use the blanket over your torso rather than covering your entire body.
How do you stay warm in a sleeping bag?
Stay warm by using an adequately rated sleeping pad, wearing appropriate base layers, eating a high-calorie snack before bed, keeping your head covered with a hat, pre-warming your bag with body heat or a hot water bottle, and ensuring the hood and draft collar are properly adjusted.
What is the zipper trick for sleeping bags?
The zipper trick involves zipping two compatible sleeping bags together to create a double sleeping bag. Both bags must have zippers on opposite sides (left-zip and right-zip) and compatible zipper configurations. This works best for rectangular bags or mummy bags with matching zipper styles.
Final Thoughts
After years of camping across all four seasons, I've learned that sleeping comfortably in a sleeping bag is 80% technique and 20% gear. The techniques in this guide transformed my outdoor experience from shivering misery to restful nights under the stars.
Start with the basics: a proper sleeping pad, appropriate temperature rating, and base layers. Master the step-by-step process of entering and adjusting your bag. Then consider the gear upgrades like a quality liner, pad, and pillow.
The investment in learning these skills pays off every single night you spend outdoors. There's nothing quite like waking up refreshed after a comfortable night in the wilderness, ready for whatever adventure the day brings.