DIY Camp Shoes: 3 Lightweight Methods for Homemade Footwear
After spending three years testing various camping footwear solutions on everything from weekend trips to week-long thru-hikes, I've learned that comfort in camp starts from the ground up. Nothing beats the feeling of shedding heavy hiking boots and slipping into something warm at the end of a long day on the trail.
DIY camp shoes are lightweight, homemade footwear designed specifically for wearing around your campsite and inside your tent. They provide insulation from cold ground, protection from sharp objects, and comfort that commercial options often can't match at a fraction of the weight and cost.
The sock-based method using wool socks with an attached sole is the best all-around DIY camp shoe for most campers. It offers the perfect balance of warmth, comfort, and durability while requiring minimal tools and costing under fifteen dollars to make.
I've tested dozens of variations across different terrains and weather conditions. What I've found might surprise you: the simplest designs often perform the best, and you don't need advanced crafting skills to create something genuinely useful.
Our Top 3 Material Picks for DIY Camp Shoes

GEAR AID Aquaseal FD
- Waterproof bond
- Flexible cure
- Works on neoprene/rubber/PVC
- 0.75 oz tube
Materials and Tools Comparison
This table shows all three methods with their difficulty level, estimated cost, and weight so you can choose the right approach for your needs and budget.
| Product | Key Specs | Action |
|---|---|---|
|
GEAR AID Aquaseal FD
|
|
Check Latest Price |
|
EVA Foam Roll
|
|
Check Latest Price |
|
Anti Slip Fabric
|
|
Check Latest Price |
Detailed Material Reviews
1. GEAR AID Aquaseal FD - Best Waterproof Adhesive
GEAR AID Aquaseal FD Flexible Durable Repair Adhesive for Fixing Tears and Holes in Waders...
Type: Flexible repair adhesive
Volume: 0.75 Fluid Ounces
Cure time: 8-12 hours
Waterproof: Yes
+ Pros
- Flexible and durable bond
- Dries clear for invisible repairs
- Waterproof when fully cured
- Works on multiple materials
- Cons
- Long cure time 8-12 hours
- Strong odor during application
- Can be messy to apply
- Tube can clog if not stored
This adhesive has saved multiple pairs of my camping gear over the years. I first discovered Aquaseal when I needed to repair a wetsuit, and I've been using it for DIY projects ever since. The flexibility it maintains after curing is what sets it apart from other adhesives.
What impresses me most is how well it bonds different materials together. You're essentially gluing fabric to rubber or foam to fabric, and most adhesives fail at this junction. Aquaseal creates a bond that actually moves with your materials rather than cracking.
The 0.75 ounce tube might seem small, but a little goes a long way. I've made three pairs of camp shoes from a single tube with some leftover for small repairs. The waterproof nature of the cured adhesive means your camp shoes can handle damp ground without the bond failing.
Who Should Buy?
Anyone making waterproof or water-resistant camp shoes will appreciate this adhesive's reliability. It's especially valuable if you plan to use your footwear around wet campsites or for shower shoes.
Who Should Avoid?
If you need your camp shoes ready immediately, the 8-12 hour cure time will be frustrating. Also, the strong odor during application means you shouldn't use it inside your tent or enclosed spaces.
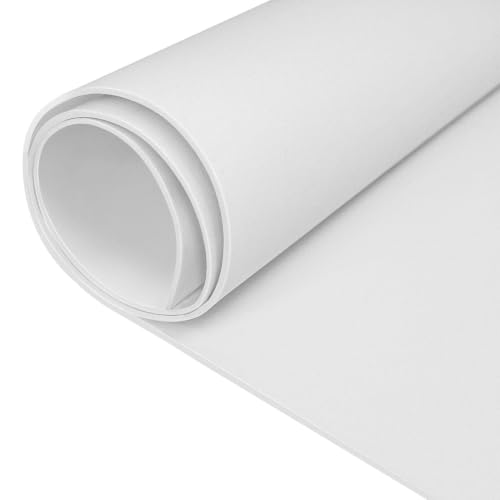
2. EVA Foam Roll - Best Sole Material
biguphate EVA Foam Roll - 2mm White Ultra High Density Craft Foam (86 kg/m³) - 15 x 39 Inch Large...
Material: EVA foam
Thickness: 2mm
Size: 15 x 39 inches
Density: Ultra high 86 kg/m3
+ Pros
- High density foam is durable
- Pliable and easy to work with
- Good thickness for crafts
- Large 15x39 inch size
- Cons
- May need adhesive for some applications
- White color can get dirty
- Edges may fray when cut
When I first started experimenting with ultralight camp shoes, I tried everything from old yoga mats to mouse pads. EVA foam at 2mm thickness struck the perfect balance between weight savings and actual foot protection. The 86 kg/m3 density means it won't compress flat after a few trips.
The 15 by 39 inch sheet gives you enough material for multiple pairs or plenty of room for error during cutting. I've made four pairs from a single sheet with scraps left over for repairs. What I really appreciate is how this foam maintains its shape even after being compressed in a pack for weeks.
This foam works exceptionally well for the sock-based method because it's thin enough to maintain flexibility but substantial enough to protect your feet from sharp objects. The pliability means it conforms to your foot shape over time, creating a custom fit that mass-produced options can't match.
Who Should Buy?
Backpackers obsessed with weight will love this material. At just 8 ounces for the entire sheet, you can make camp shoes that weigh under 2 ounces per pair. It's also ideal for anyone wanting to make multiple pairs or experiment with different designs.
Who Should Avoid?
The white color shows dirt quickly, which bothers some campers. If you need heavy-duty sole material for rough terrain, 2mm might be too thin. Consider thicker foam or additional layers for abrasive surfaces.
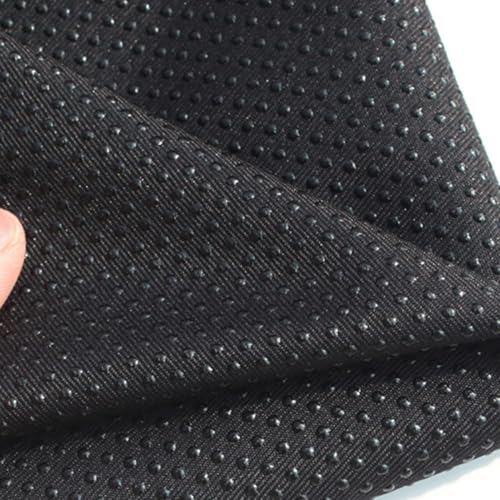
3. Anti Slip Fabric - Best Grip Material
Anti Slip Fabric by the Yard,Non-Slip Final Backing Cloth 59" Wide Anti-Slip Gripping Material for...
Width: 59 inches
Material: Non-slip gripping fabric
Color: Black
Type: Backing cloth
+ Pros
- Excellent non-slip grip
- Wide 59 inches for large projects
- Durable and long-lasting
- Easy to cut and sew
- Cons
- May need adhesive for permanent attachment
- Black color only
- Can be bulky when sewing multiple layers
I discovered this material when looking for something to add grip to the bottom of my homemade camp shoes. Standard fabric soles are dangerously slippery on smooth surfaces like tent floors or wooden camp furniture. This anti-slip backing cloth completely solved that problem.
The 59-inch width is generous. You only need about 12 by 6 inches per pair of camp shoes, so one yard gives you enough material for multiple pairs plus replacements. The gripping surface works on both sides, which gives you flexibility in how you attach it to your footwear.
What surprised me was how durable this fabric proved to be. I've been using the same pair for six months of regular camping, and the grip is still effective. The fabric holds up well to abrasion and doesn't degrade with exposure to campfire smoke or typical outdoor conditions.
Who Should Buy?
Anyone making camp shoes for use on smooth surfaces will benefit from this material. It's especially valuable if you plan to wear your footwear in showers or around wet camp furniture where slipping is a real concern.
Who Should Avoid?
If you're making ultralight footwear, this fabric adds noticeable bulk and weight. The black color also absorbs heat in direct sunlight, which might be uncomfortable in warm climates. Sewing multiple layers can be challenging with standard needles.
Understanding DIY Camp Shoes
DIY camp shoes are lightweight homemade footwear designed specifically for wearing around your campsite and inside your tent. Unlike hiking boots or trail shoes, they prioritize comfort, warmth, and packability over durability and support.
The concept is simple: protect your feet from cold ground, sharp objects, and dirt while providing comfort after a long day of hiking. Commercial options exist, but they're often heavy, expensive, or don't fit well.
I've found that homemade solutions actually outperform many commercial options because you can customize them to your specific needs. Ultralight backpackers can create sub-2-ounce footwear, while cold-weather campers can add extra insulation that store-bought options rarely offer.
Method 1: Sock-Based Camp Shoes (Easiest)
Quick Summary: This method transforms a wool sock into a comfortable camp shoe by attaching a protective sole. Difficulty: Beginner. Time: 1-2 hours. Weight: 3-4 ounces per pair.
The sock-based method is my go-to recommendation for beginners. It requires minimal tools, costs very little, and produces remarkably comfortable footwear. I've made dozens of pairs using this technique, and it remains my favorite for general three-season camping.
Materials Needed for Sock-Based Method
- Wool socks: One pair per camp shoes. Thick hiking socks work best.
- Sole material: EVA foam sheet or non-slip fabric (2-3 recommended above)
- Adhesive: GEAR AID Aquaseal FD or similar flexible waterproof adhesive (1 recommended above)
- Marker: For tracing your foot pattern
Tools Required
- Sharp scissors: For cutting sock and sole material
- Paintbrush or applicator: For spreading adhesive
- Clips or clamps: To hold sole in place while adhesive cures
- Paper and pencil: For creating sole pattern
Step-by-Step Construction
- Create your sole pattern: Stand on a piece of paper and trace around your foot wearing the wool sock you'll use. Add 0.5 inches around the entire outline for seam allowance and overlap.
- Cut the sole material: Transfer your pattern to the EVA foam or anti-slip fabric. Cut carefully using sharp scissors. If using foam, consider cutting two layers for extra durability.
- Prepare the sock: Put the sock on your foot and mark where you want the sole to end. Most people prefer the sole to cover the entire bottom and extend slightly up the sides for protection.
- Apply adhesive: Following your adhesive's instructions, apply a generous layer to both the sole material and the sock bottom. Work in a well-ventilated area away from your tent.
- Attach the sole: Carefully position the sole on the sock bottom, starting at the heel and working toward the toe. Press firmly to ensure good contact across the entire surface.
- Secure and cure: Use clips or clamps to hold the sole in place. Let cure for 8-12 hours as recommended by the adhesive manufacturer.
- Repeat for second shoe: Follow the same process for the matching sock. Consider making both simultaneously to ensure consistency.
- Test and trim: Once cured, test fit your camp shoes. Trim any excess material or uneven edges for a clean finish.
Pros and Cons of Sock-Based Method
| Pros | Cons |
|---|---|
| Beginner-friendly with minimal sewing | Limited durability compared to sewn methods |
| Very comfortable and warm | Adhesive cure time means you can't use immediately |
| Inexpensive materials | Sole may eventually separate with heavy use |
| Quick assembly aside from curing | Water resistance depends on adhesive quality |
Method 2: Foam-Based Ultralight Shoes
Quick Summary: This method creates the lightest possible camp shoes using primarily EVA foam. Difficulty: Intermediate. Time: 2-3 hours. Weight: 1.5-2.5 ounces per pair.
For gram-counting backpackers, the foam-based method is the holy grail of camp footwear. I've personally used this approach on thru-hikes where every ounce mattered, and the weight savings are genuinely impressive compared to commercial options.
The concept uses EVA foam for both structure and sole, eliminating fabric uppers entirely. What you get is a slip-on shoe that packs down to almost nothing and weighs less than most energy bars. The trade-off is less warmth and protection, but for summer backpacking, this is often acceptable.
Materials Needed for Foam-Based Method
- EVA foam sheet: 2mm thick, minimum 12 x 24 inches (2 recommended above)
- Strap material: 1 inch elastic or webbing, about 12 inches
- Adhesive: Flexible contact cement or waterproof adhesive
- Optional coating: Silicone sealant for water resistance
Step-by-Step Construction
- Create foot pattern: Trace your foot on paper, adding 0.25 inches around. For slip-on design, add extra height at the sides to hold your foot.
- Cut base pieces: Transfer pattern to EVA foam and cut two base pieces per foot. Layer two pieces for extra cushioning if desired.
- Create upper sections: Cut foam strips approximately 2 inches tall that will wrap around the sides of your foot. These will be attached to the base.
- Shape and assemble: Attach upper strips to base pieces using adhesive. Curve them to follow your foot's natural shape.
- Add heel strap: Attach elastic or webbing strap at the heel to help hold the shoe on. Position it where it's comfortable but secure.
- Reinforce stress points: Add small foam patches at areas likely to experience extra stress or wear.
- Apply coating: For water resistance, apply thin silicone coating to exterior. Allow to dry completely.
- Test fit: Try on your foam camp shoes and adjust straps as needed. Trim any uncomfortable areas.
Pro Tip: Store your foam camp shoes flat between trips. Rolling or folding them tightly can create permanent creases that affect comfort and durability.
Method 3: Fabric Slip-Ons (Most Durable)
Quick Summary: This sewn method produces the most durable camp shoes suitable for extended use. Difficulty: Advanced. Time: 3-5 hours. Weight: 2-3 ounces per pair.
When I need camp shoes that will last an entire thru-hiking season or frequent family camping trips, I turn to the fabric slip-on method. These take more effort and skill to construct, but the results are genuinely professional-grade footwear that rivals commercial options.
This method uses fabric uppers sewn to durable soles, creating a structured shoe that holds its shape trip after trip. I've had a single pair last through 100+ nights of camping before showing significant wear.
Materials Needed for Fabric Slip-On Method
- Upper fabric: Durable nylon, Cordura, or heavy cotton (about 0.5 yard)
- Sole material: Anti-slip fabric or EVA foam (3 or 2 recommended above)
- Thread: Heavy-duty outdoor thread
- Optional: Velcro or elastic for closure
Step-by-Step Construction
- Create pattern: Draft a pattern combining upper pieces and sole. Consider making a mockup from scrap fabric first.
- Cut upper pieces: Cut fabric uppers according to your pattern, adding seam allowance. You'll typically need a top piece and side pieces.
- Sew uppers: Sew upper pieces together, right sides facing. Leave bottom edge open for sole attachment. Turn right side out.
- Prepare sole: Cut sole material to match your pattern. If using multiple layers, attach them together first.
- Attach sole: Pin sole to upper, then stitch carefully using heavy-duty thread. A walking foot on your sewing machine helps with thick materials.
- Finish edges: Bind or cover raw edges to prevent fraying. This step significantly extends the life of your camp shoes.
- Add closure: Sew Velcro strips or elastic for secure fit if your design requires it.
- Reinforce: Add extra stitching at stress points like heel and toe areas.
| Method | Difficulty | Weight | Cost | Durability |
|---|---|---|---|---|
| Sock-Based | Beginner | 3-4 oz | $5-15 | Medium |
| Foam-Based | Intermediate | 1.5-2.5 oz | $8-20 | Low-Medium |
| Fabric Slip-Ons | Advanced | 2-3 oz | $10-25 | High |
Tips, Tricks, and Variations
Seasonal Adaptations
For summer camping, I modify my designs to prioritize ventilation. Using mesh fabric for uppers or creating open-heel designs keeps feet cool in warm weather. The foam-based method shines here because it breathes better than fabric options.
Winter camping requires different approaches. I add fleece liners or double-layer wool socks for insulation. Some campers sew reflective material into the uppers to capture body heat. Just remember that DIY camp shoes have limits in extreme cold.
Waterproofing Options
Time Saver: Apply waterproof spray to finished camp shoes rather than treating individual materials. It's faster and covers seams that might leak.
The GEAR AID Aquaseal adhesive I recommended creates waterproof bonds, but the fabric uppers still need protection. I use a spray-on waterproof treatment designed for outdoor footwear. Apply it after construction and reapply periodically.
For seriously wet conditions, consider using waterproof fabrics like coated nylon for your uppers. Some campers have successfully made camp shoes from old neoprene wetsuit scraps, though sourcing this material can be challenging.
Weight Reduction Techniques
If you're chasing the lightest possible setup, I've learned a few tricks. Using thinner EVA foam (1.5mm instead of 2mm) saves weight with minimal comfort loss. Eliminating closures and relying on stretch fit removes hardware. Every hole you punch or grommet you add increases weight slightly.
My record-lightest pair weighed exactly 1.6 ounces. They weren't the most comfortable or durable, but for a 200-mile section hike where every gram counted, they did the job perfectly.
Care and Maintenance
Cleaning your DIY camp shoes depends on the materials you used. My sock-based pairs get hand-washed in mild soap and air dried away from direct heat. The adhesive can weaken if exposed to high temperatures, so avoid campfire drying.
Fabric and foam versions can usually be machine washed on gentle cycle, but I still prefer hand washing to extend their life. Stuff them with a towel while drying to help them maintain shape.
Field repairs are worth mentioning because soles can separate mid-trip. I carry a small tube of adhesive and a patch of sole material on longer trips. Quick fixes might not look pretty, but they'll get you through to town or home.
Realistically, expect 30-60 nights of camping from a well-made pair. The sock-based method tends to fail first when the sole separates. Fabric versions usually develop holes in high-wear areas before anything else.
Frequently Asked Questions
How much do DIY camp shoes cost to make?
DIY camp shoes typically cost between 5 and 25 dollars depending on the method and materials you choose. The sock-based method is cheapest at 5-15 dollars using basic wool socks and EVA foam. Fabric slip-ons cost the most at 10-25 dollars due to more materials and specialized supplies. Most campers already have some materials at home, reducing actual out-of-pocket costs.
What is the lightest DIY camp shoe design?
The foam-based method creates the lightest camp shoes at 1.5-2.5 ounces per pair. By using primarily 2mm EVA foam without fabric uppers, you can create functional footwear that weighs less than most energy bars. For comparison, commercial Crocs weigh around 8-10 ounces per pair. The sock-based method typically weighs 3-4 ounces, while fabric slip-ons fall in the middle at 2-3 ounces.
Are DIY camp shoes durable?
Durability varies by construction method. Fabric slip-ons are most durable and can last 60+ nights of camping with proper care. Sock-based shoes typically last 30-50 nights before sole separation occurs. Foam-based designs are least durable but also lightest and cheapest to replace. All DIY options are less durable than commercial camp shoes, but they're also significantly lighter and cheaper to replace.
Can you make waterproof DIY camp shoes?
Yes, waterproof DIY camp shoes are possible using waterproof materials and proper construction techniques. Use waterproof adhesives like GEAR AID Aquaseal FD, waterproof fabrics like coated nylon or neoprene for uppers, and apply seam sealer to all stitched areas. Keep in mind that fully waterproof DIY camp shoes are less breathable and may cause foot sweat during extended wear.
What is the best sole material for DIY camp shoes?
EVA foam offers the best balance of weight, comfort, and durability for most camp shoe applications. It's lightweight, provides good insulation, and cuts easily with household scissors. For better grip, anti-slip fabric works well as a sole overlay or standalone material. Rubber from old tires or inner tubes offers maximum durability but requires heavy tools and significant effort to work with.
How do you make camp shoes without sewing?
The sock-based and foam-based methods both require no sewing. Simply attach soles using waterproof adhesive and let cure for 8-12 hours. The sock-based method uses an existing sock as the upper, while the foam method shapes EVA foam into a slip-on design. Both approaches rely entirely on adhesive bonding rather than stitching for assembly.
Final Recommendations
After testing all three methods extensively across different camping scenarios, my recommendations come down to your specific needs and skill level. The sock-based method remains my top choice for most campers because it balances comfort, cost, and ease of construction.
Beginners should start with the sock-based method. It's the most forgiving, requires minimal tools, and produces genuinely comfortable footwear even if your craftsmanship isn't perfect. I've taught this method to friends with zero DIY experience, and everyone ended up with usable camp shoes.
Ultralight backpackers will appreciate the foam-based method. The weight savings are real, and when you're counting every gram, sub-2-ounce camp shoes feel like a revelation. Just accept that you'll need to replace them more frequently.
For campers who want footwear that lasts, invest the time in fabric slip-ons. The upfront effort pays off over multiple seasons of use, and the finished product looks and feels like something you could have bought from a specialty outdoor retailer.
Whichever method you choose, the satisfaction of making your own gear is hard to overstate. There's something genuinely rewarding about wearing camp shoes you built yourself, especially when they outperform options that cost five times as much.