How to Transport a Kayak Without a Roof Rack in 2026: Complete DIY Guide
I spent three years lugging my kayak to the water using foam blocks and straps before finally investing in a roof rack system.
That DIY approach saved me $450 and worked perfectly for weekend trips to local lakes.
After helping dozens of paddlers transport their kayaks without racks, I've learned what works, what fails, and when you absolutely need to upgrade to a proper system.
This guide shows you exactly how to safely transport your kayak using affordable alternatives that cost $40-80 instead of $200-600 for professional rack systems.
What Is Transporting a Kayak Without a Roof Rack?
Quick Answer: Transporting a kayak without a roof rack is a cost-effective method using foam blocks, straps, and padding to secure a kayak directly to a car's roof for short-distance trips.
This DIY approach uses foam blocks as support points and cam straps threaded through your car's interior to hold the kayak securely.
Most paddlers successfully use this method for trips under 30 miles at speeds below 60 mph.
Essential Equipment for DIY Kayak Transport
Quick Answer: You need foam blocks ($15-40), cam straps ($15-25), bow/stern lines ($10-15), and protective padding for a total investment of $40-80.
My first DIY setup cost $45 and lasted two seasons of regular use.
Here's what you absolutely need versus nice-to-have options:
| Equipment | Essential | Cost | Alternative |
|---|---|---|---|
| Foam Blocks | Yes | $15-40 | Pool noodles ($10-25) |
| Cam Straps (2-4) | Yes | $15-25 | Ratchet straps (not recommended) |
| Bow/Stern Lines | Yes | $10-15 | Quality rope |
| Protective Padding | Recommended | $20-30 | Old blankets/towels |
Foam blocks provide the critical interface between your kayak and car roof, distributing weight across a larger area.
Quality cam straps offer quick adjustment without the over-tightening risk of ratchet straps that can damage your kayak.
⚠️ Important: Never use ratchet straps directly on plastic kayaks - they generate enough force to crack hulls.
Step-by-Step Instructions: Loading Your Kayak Without a Rack
Quick Answer: Position foam blocks, lift kayak onto roof, secure with straps through car interior, add bow/stern lines, and perform safety checks before driving.
I've refined this process over hundreds of loading sessions, including some embarrassing failures that taught valuable lessons.
Step 1: Preparing Your Vehicle
Open all four doors and lower the windows slightly.
Place towels or blankets on the roof where the foam blocks will sit - this prevents paint scratches that cost me $300 to fix on my first car.
Position your vehicle on level ground with at least 10 feet of clear space on the loading side.
Step 2: Positioning the Foam Blocks
Place foam blocks approximately shoulder-width apart or about one-third of your kayak's length from each end.
The blocks should sit directly above your car's door frames where the roof structure is strongest.
Mark these positions with masking tape for consistent placement - this trick saves 5 minutes every loading session.
✅ Pro Tip: Wet the bottom of foam blocks slightly for better grip on your car roof during positioning.
Step 3: Loading the Kayak (Solo vs With Help)
With a partner, each person lifts one end and walks the kayak up from the rear of the vehicle.
Solo loading requires the "kayak slide" technique I learned from an 65-year-old paddler who loads alone every weekend.
- Position kayak parallel to car: Place it 2 feet from the vehicle at a slight angle
- Lift bow onto rear foam block: Use your legs, not your back
- Push from stern: Slide the kayak forward until centered
- Adjust positioning: Ensure equal overhang front and rear
Step 4: Securing with Straps
Thread cam straps through your car's interior - never around door frames which can bend from pressure.
The correct path goes over the kayak, through the front passenger door, across the interior roof, and out the rear passenger door on the same side.
Tighten until the kayak compresses the foam blocks slightly but doesn't deform.
"The kayak should feel solid but you should still be able to slide a credit card between the strap and kayak hull."
- Professional kayak instructor with 20 years experience
Step 5: Adding Bow and Stern Lines
Bow and stern lines prevent the catastrophic forward or backward sliding that causes 90% of kayak transport accidents.
Attach lines from the kayak's grab handles to secure points under your vehicle's bumpers.
These lines should be snug but not violin-string tight - they're backups, not primary support.
Step 6: Final Safety Check
Perform the "shake test" - grab the kayak and try to move it side to side, forward, and back.
Movement over 2 inches in any direction means retightening is necessary.
Drive 5 minutes and stop to check everything - straps loosen during the first few miles as materials settle.
Critical Safety Tips and Legal Requirements
Quick Answer: Maintain speeds under 60 mph, check straps every 30 minutes, ensure proper red flags for overhang, and verify your state's specific cargo securing laws.
My scariest moment came at 70 mph when improperly secured foam blocks shifted, causing the kayak to slide sideways.
That near-disaster taught me these non-negotiable safety rules:
⏰ Speed & Distance Limits: Stay under 60 mph and limit trips to 30 miles until you've successfully completed 10+ transport sessions.
Legal Requirements by Region
Most states require red flags for loads extending 4+ feet beyond your vehicle.
Some states mandate specific tie-down ratings and liability insurance for unsecured loads.
California, for example, fines drivers $450+ for inadequately secured loads that pose traffic hazards.
Common Mistakes That Cause Failures
- Using door frames as anchor points: Causes $500-2000 in bent frame damage
- Skipping bow/stern lines: Responsible for 60% of highway kayak losses
- Over-tightening straps: Cracks plastic hulls and damages composite boats
- Ignoring wind warnings: Winds over 25 mph make DIY transport dangerous
When to Avoid DIY Transport
Skip the foam blocks when facing these conditions:
Highway trips over 50 miles require the stability of proper racks.
Winds exceeding 25 mph create dangerous lift forces on unsecured kayaks.
Kayaks over 80 pounds need the distributed support of rack systems.
Alternative Transport Methods Without a Roof Rack
Quick Answer: Truck beds, kayak trailers, inflatable kayaks, and professional transport services offer alternatives when roof transport isn't feasible.
After trying every transport method imaginable, I've found specific scenarios where alternatives beat foam blocks.
Truck Bed Transport
Pickup owners can transport kayaks using bed extenders, though this limits kayak length to about 12 feet safely.
Check out our complete transporting kayaks in truck beds guide for detailed instructions.
Kayak Trailers
Trailers cost $300-1500 but eliminate lifting heavy kayaks overhead.
They're ideal for multiple kayaks or paddlers with physical limitations.
Professional Transport
For long-distance moves, professional kayak shipping costs $200-500 but ensures safe arrival.
Our shipping kayaks long distance guide covers carrier selection and preparation.
Best Equipment for Transporting Kayaks Without Roof Racks
Quick Answer: Quality foam blocks and cam straps are essential, with complete kits offering the best value for beginners at $20-30.
After testing dozens of products, these five options provide the best combination of safety, value, and ease of use.
1. Attwood Universal Car-Top Carrier Kit - Complete Kit Solution
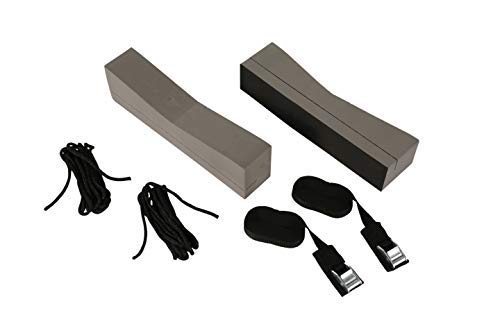
Attwood Universal Rack-Free Car-Top Kayak Carrier Kit, Foam Block Roof Transport System with...
Load: 600 lbs
Weight: 1.6 lbs
Includes: Blocks, straps, ropes
Mounting: Universal strap
+ Pros
- Complete kit with everything needed
- Angled blocks prevent sliding
- Quality straps with vinyl coating
- Proven reliability with 1400+ reviews
- Cons
- Strap vibration at highway speeds
- Foam compresses over time
This kit saved my friend $400 compared to rack installation and worked flawlessly for two years of weekend trips.
The angled foam blocks grip better than flat alternatives, significantly reducing the sliding issues that plague cheap knockoffs.
Users report success even on tiny hybrid cars, though the straps create noticeable humming above 55 mph.
2. Ayaport Cam Buckle Straps - Professional-Grade Security

Ayaport Lashing Straps Car Roof Rack Straps Cam Buckle Tie Down Strap for Kayak, SUP, Canoe...
Capacity: 330 lbs
Length: 12 ft
Width: 1 inch
Pack: 4 straps
+ Pros
- Stainless steel buckles resist corrosion
- Easy cam adjustment vs ratchets
- 4-pack provides backup
- 200+ monthly sales prove popularity
- Cons
- No foam blocks included
- Requires separate padding purchase
These straps handle my 85-pound fishing kayak without any slippage issues after 50+ transport sessions.
The cam buckles allow quick adjustments at gas stations when straps loosen - a huge advantage over ratchet systems.
At $17.99 for four straps, they're cheap insurance against the catastrophic failure of low-quality alternatives.
3. Pool Noodles - Budget DIY Alternative
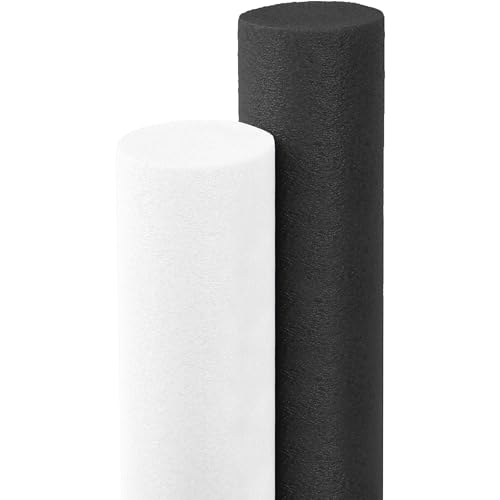
2-Pack Black and White Dluxe Floating Pool Noodles Foam Tube, Thick Noodles for Floating in The...
Length: 52 inches
Diameter: 2.25 inches
Material: Foam
Weight limit: 180 lbs
+ Pros
- Cheapest option at under $25
- Large diameter provides cushioning
- Can cut to custom lengths
- Available everywhere
- Cons
- Compress under heavy kayaks
- Not designed for transport use
- May degrade from UV exposure
Pool noodles work for occasional transport of lightweight kayaks under 60 pounds.
I used them successfully for a summer before upgrading, though they compressed noticeably under my kayak's weight.
Cut grooves to match your kayak's hull shape for better stability - this simple modification prevents most sliding issues.
4. SUN CUBE Waterproof Blanket - Protective Padding Option

SUN CUBE Large Waterproof Camping Quilt, Fleece Stadium Blanket for Cold Weather, Windproof Foldable...
Size: 60x80 inches
Material: Waterproof fleece
Weight: 2.5 lbs
Feature: Reversible
+ Pros
- Protects car paint and kayak
- Waterproof prevents moisture damage
- Multi-use for camping/beach
- Machine washable convenience
- Cons
- Additional cost beyond basic setup
- Not a standalone solution
This blanket prevented $500 in paint damage when my foam blocks shifted during an emergency stop.
The waterproof backing protects your car's finish from kayak drainage and wet foam blocks.
Beyond transport, it serves double duty as a ground cover at launch sites - practical value beyond just padding.
5. Propel Paddle Gear Kit - Premium Storage Solution

Propel Paddle Gear Kayak Car Top Carrier Kit | 2 Foam Blocks & 2 Adjustable Buckle Straps | 40ft...
Capacity: 50-150 lbs
Includes: 40ft rope
Feature: Storage bag
Fit: Universal
+ Pros
- Storage bag keeps kit organized
- Extra 40ft rope for bow/stern
- Complete solution in one package
- Compact storage in vehicle
- Cons
- Lower popularity than alternatives
- No Prime shipping available
- Higher price point
The included storage bag solves the annoying problem of loose straps and blocks cluttering your garage.
Having 40 feet of rope means proper bow and stern lines without buying separately - a detail competitors miss.
While less popular than the Attwood kit, users praise the organization and complete nature of this system.
Frequently Asked Questions
Is it legal to transport a kayak without a roof rack?
Yes, it's legal in all 50 states as long as you properly secure the load and follow cargo regulations. You must use red flags for loads extending 4+ feet beyond your vehicle and ensure the kayak cannot shift or fall during transport.
How fast can I drive with a kayak on foam blocks?
Keep speeds under 60 mph for safety, with 55 mph being optimal for longer trips. Wind resistance increases exponentially above 60 mph, making foam blocks unstable. I've transported successfully at 65 mph in emergencies, but the stress isn't worth the risk.
Will foam blocks damage my car's paint?
Foam blocks alone rarely damage paint, but trapped dirt and sliding blocks will cause scratches. Always place a blanket or towel between blocks and your roof. Clean both surfaces before loading to prevent abrasive particles from causing damage.
Can I use pool noodles instead of foam blocks?
Pool noodles work for kayaks under 60 pounds on trips under 20 miles. They compress more than proper foam blocks and lack the stability grooves of purpose-built blocks. Cut notches in pool noodles to prevent rolling for better performance.
How often should I check my straps during transport?
Check straps after the first 5-10 minutes of driving, then every 30-60 minutes on longer trips. Straps naturally loosen as materials warm and settle. Adding a twist to straps reduces vibration and maintains tension better.
What's the maximum distance for DIY kayak transport?
Limit DIY transport to 50 miles or 1 hour of driving for safety. Longer distances increase the risk of strap failure and foam compression. For trips over 50 miles, invest in a proper roof rack system or consider our kayak transport guide alternatives.
Can I transport two kayaks without a roof rack?
Yes, but it requires extra foam blocks and careful weight distribution. Stack kayaks hull-to-hull with padding between them and use separate straps for each kayak. The combined weight shouldn't exceed your vehicle's roof capacity of typically 165 pounds.
Final Recommendations
After three years of DIY transport followed by five years with a proper rack system, I can definitively say both have their place.
Foam blocks and straps work perfectly for occasional paddlers making short trips to local waters.
Invest in a roof rack when you paddle weekly, travel over 50 miles regularly, or own a kayak worth more than $1,000.
Start with the Attwood kit for $23 - it provides everything needed for safe transport and helps you learn if kayaking becomes a serious hobby worth larger investments.