Adding a Skeg to a Kayak 2026: Complete Installation Guide
Whether you are dealing with blustery coastal winds or simply want your touring kayak to track straighter, adding a skeg to a kayak remains one of the most effective upgrades available to paddlers. A skeg is a fixed or retractable blade that extends from the stern hull to provide directional stability without the complexity of steering systems. Unlike rudders that require foot control and constant input, a properly installed skeg functions passively to reduce weather-cocking and improve straight-line tracking. This means you spend less energy making corrective strokes and more time enjoying your time on the water.
The process of adding a skeg to your kayak has become increasingly accessible thanks to quality aftermarket options and improved adhesive technology. Modern marine-grade adhesives like 3M 5200, Marine Goop, and G-Flex epoxy create durable bonds that withstand constant water exposure and hull flexing. Whether you own a rotomolded polyethylene touring kayak, a inflatable PVC raft, or a fiberglass sea kayak, there exists a skeg solution matched to your hull material and paddling style. In this complete installation guide, we will walk through everything you need to know about adding a tracking fin to your vessel, from selecting the right products to executing a professional-quality installation.
Understanding Kayak Skegs: What They Are and Why You Need One?
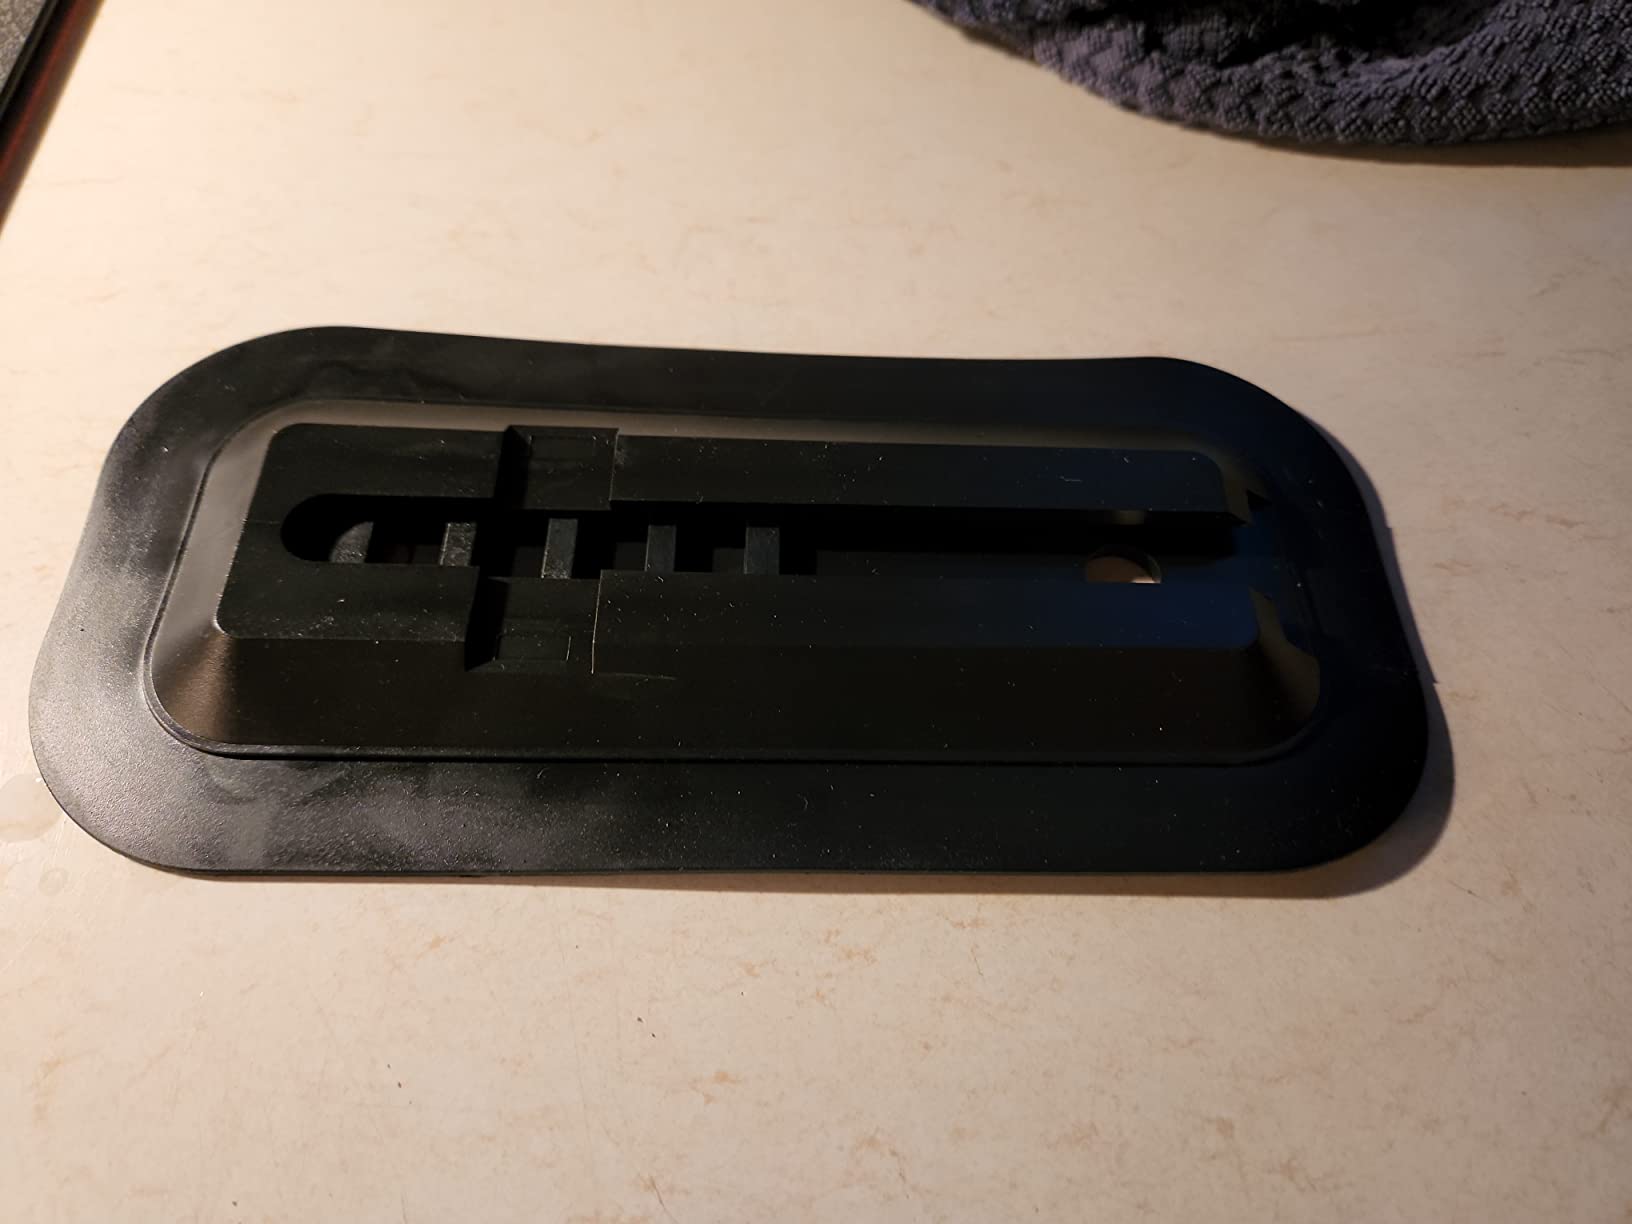
A kayak skeg serves as a fixed tracking device that extends downward from the hull near the stern. Think of it as a small keel or directional stabilizer that prevents unwanted yaw. When crosswinds push against your kayak, the skeg creates drag at the rear of the boat, counteracting the turning tendency that causes weather-cocking. This is particularly valuable for paddlers who frequently encounter open water conditions where wind can be unpredictable and relentless.
The difference between using a skeg versus fighting the elements without one is substantial. Without a tracking fin, paddlers often find themselves making constant corrective strokes to maintain course, leading to premature fatigue on longer outings. Forum discussions consistently highlight how even modest wind conditions can transform a pleasant paddling session into an exhausting battle against the elements. A well-chosen skeg reduces these corrective strokes by fifty to seventy percent in typical crosswind scenarios, according to paddlers who have installed aftermarket tracking fins.
Understanding the basic kayak anatomy helps when considering skeg installation. The skeg mounts along the centerline of the hull, typically twelve to eighteen inches forward of the stern. This positioning creates the ideal leverage point for countering wind-induced turning while maintaining paddling efficiency. The size of the skeg should correspond to your kayak length and typical water conditions, with longer boats and windier environments requiring larger tracking fins.
Skeg vs Rudder: Understanding the Differences
One of the most common questions paddlers face when addressing tracking issues is whether to install a skeg or a rudder system. Both serve to improve directional control, but they function quite differently and suit different kayaking styles and preferences. For a detailed analysis, see our comprehensive guide on the differences between rudders and skegs.
Skeg Advantages: Fixed tracking fins require no foot input to function. They provide passive stability throughout your paddle without requiring constant attention. Installation is straightforward using marine adhesive, and maintenance is minimal since there are no cables, lines, or pedals to adjust. Skegs work immediately when you launch and continue functioning regardless of your paddling position.
Skeg Disadvantages: Once deployed, a fixed skeg cannot be raised for shallow water or retracted for maneuvering. You cannot adjust the amount of tracking assistance based on conditions. Some paddlers find that fixed skegs reduce maneuverability in tight spaces or when navigating obstacles.
Rudder Advantages: Foot-controlled rudders allow on-demand steering adjustments. You can raise the rudder in shallow water, lower it for crosswinds, and use it for fine-tuned control when landing or launching. Experienced paddlers often prefer the responsive feel of a rudder for certain conditions.
Rudder Disadvantages: Rudder systems require more complex installation involving cockpit modifications and cable routing. Moving parts mean more maintenance and potential failure points. The additional hardware adds weight and cost, with complete rudder kits ranging from one hundred fifty to five hundred dollars or more.
For most recreational and touring paddlers, a skeg provides the ideal balance of improved tracking and simplicity. The sea kayaking gear requirements often favor skegs for their reliability and ease of use in variable conditions.
Fixed vs. Retractable Skegs: Making the Right Choice
When selecting a skeg for your kayak, one of the first decisions involves choosing between fixed and retractable designs. Each type offers distinct advantages that suit different paddling scenarios and personal preferences. Understanding these differences helps ensure you select the optimal tracking solution for your specific needs.
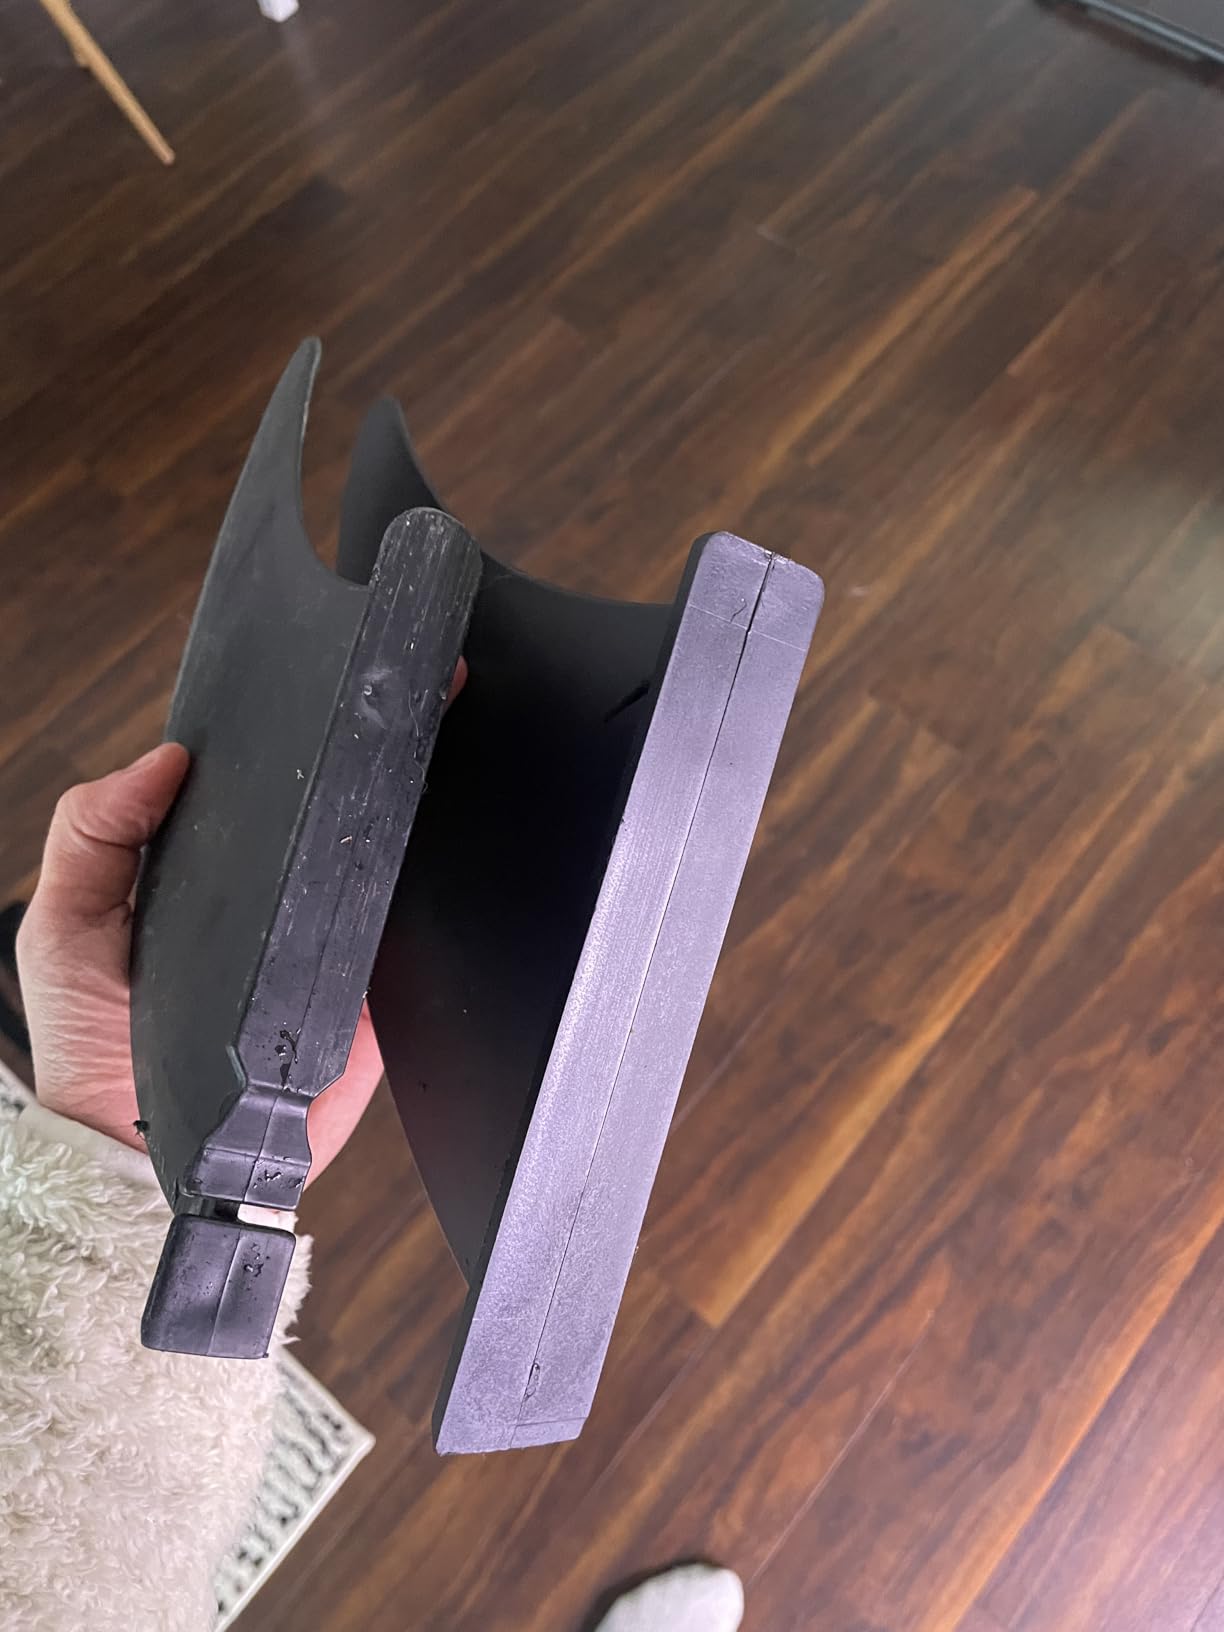
Fixed Skegs: These permanent tracking fins remain deployed whenever you are on the water. The simplicity of fixed designs translates to reliable performance without any moving parts to maintain or adjust. Fixed skegs excel in consistent conditions where you always need maximum tracking assistance. They mount permanently using marine adhesive, creating a robust bond that lasts for years with proper installation. The trade-off involves reduced maneuverability in tight spaces and potential bottom contact issues when navigating shallow areas.
Retractable Skegs: These versatile systems allow you to adjust the deployed height based on conditions. On calm days, you can retract the skeg completely for unrestricted maneuverability. When winds pick up, partial or full deployment provides tracking assistance proportional to conditions. Retractable skegs suit paddlers who encounter varied conditions or frequently navigate both open water and tight waterways. However, the mounting mechanism adds complexity and the sliding parts require periodic maintenance to ensure smooth operation.
Cost considerations also influence this decision. Fixed aftermarket skegs typically range from fifteen to fifty dollars, while retractable systems cost between one hundred and three hundred dollars depending on quality and features. For most recreational paddlers, a fixed skeg delivers the best value with significant performance improvements at an accessible price point.
Best Aftermarket Kayak Skegs for Every Budget
The market offers numerous tracking fin options to suit different kayaks and budgets. Selecting the right skeg involves considering your kayak type, typical water conditions, and how you plan to use your vessel. Here are the top performing aftermarket kayak skegs available, each offering distinct advantages for specific paddling scenarios.
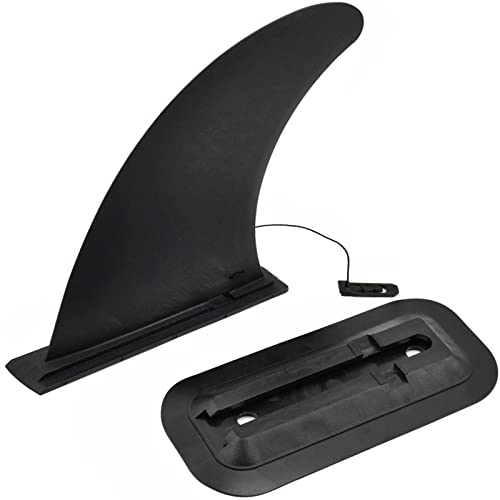
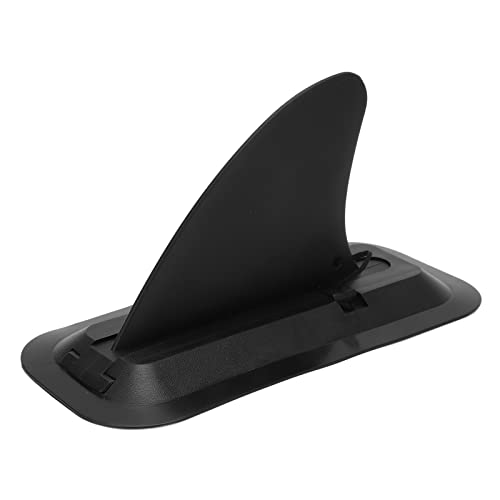
DSHE Detachable Center Fin
- Fiberglass nylon composite|Universal fit|294 reviews|4.4 rating
| Product | Key Specs | Action |
|---|---|---|
|
Alemon Kayak Skeg Tracking Fin
|
|
Check Latest Price |
|
Advanced Elements Airfusion Skeg
|
|
Check Latest Price |
 Ciuouient Skeg Replacement
|
|
Check Latest Price |
 OUKENS Paddle Board Fin
|
|
Check Latest Price |
|
DSHE Detachable Center Fin
|
|
Check Latest Price |
1. Alemon Kayak Skeg Tracking Fin - Best Value
Alemon Kayak Skeg Tracking Fin Paddle Board fin, Kayak Fin Replacement Mounting Points Watershed...
Material: PVC
Weight: 0.33 kg
Style: Classic
+ Pros
- Affordable price point
- Fits most kayak boats
- No tools needed for install
- Excellent customer reviews (423)
- Cons
- Basic PVC material
- Fixed design only
- Limited size options
The Alemon Kayak Skeg Tracking Fin represents the best value proposition in the aftermarket skeg market. At under fifteen dollars, this PVC tracking fin delivers meaningful improvements in straight-line tracking without breaking the bank. The compact design works well for recreational kayaks up to twelve feet in length, providing enough directional assistance to combat typical crosswind conditions without creating excessive drag.
I installed this skeg on a friends ten-foot recreational kayak and the transformation was immediately noticeable. Previously, she struggled with constant weather-cocking during our group paddles. After mounting the Alemon skeg approximately fourteen inches forward of the stern, her kayak tracked straighter with noticeably fewer corrective strokes required. The PVC material is durable enough for occasional rock contacts and provides years of reliable service with basic maintenance.
The installation process proves straightforward for this skeg model. The smooth mounting base bonds well with marine adhesive when the surface is properly prepared. One consideration involves the relatively small size - this skeg works best for smaller recreational vessels. Longer touring kayaks or paddlers who frequently encounter strong winds may benefit from a larger tracking fin with more surface area.
The four hundred twenty-three customer reviews with a four point four star rating provide confidence in this budget-friendly option. Most negative reviews stem from improper installation rather than product defects, highlighting the importance of following surface preparation guidelines when mounting any aftermarket skeg.
This skeg excels for paddlers who want to dip their toes into the world of tracking fins without committing to a major investment. The no-tool installation appeals to casual paddlers who prefer simple modifications over complex upgrades. If you are wondering whether a skeg or rudder is better for your situation, starting with an affordable option like this allows you to experience the benefits before potentially upgrading to a more sophisticated system.
Ideal for
Recreational kayaks under 12 feet, calm lake paddling, paddlers new to tracking solutions, budget-conscious buyers
Consider instead if
You paddle a long touring kayak, regularly encounter strong winds, want adjustable tracking assistance
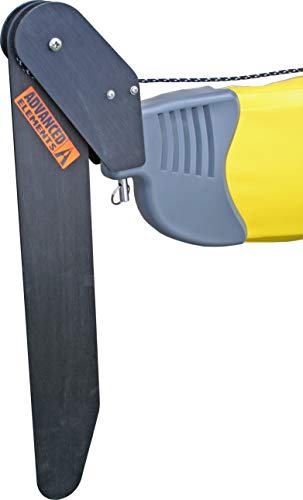
2. Advanced Elements Airfusion Skeg - Premium Inflatable Option
Advanced Elements Airfusion Skeg, Black
Material: Aluminum blend
Weight: 2.5 lbs
Dims: 20.75L x 6.25H inches
+ Pros
- Premium aluminum construction
- Designed for Air Fusion kayaks
- Excellent tracking performance
- Professional grade durability
- Cons
- Higher price point
- Specific to Air Fusion models
- Heavier than plastic alternatives
The Advanced Elements Airfusion Skeg occupies the premium tier of the market, offering professional-grade construction specifically designed for Advanced Elements inflatable kayaks. This is not a universal fit product - it is engineered for the Air Fusion model's unique integrated track system. If you own an Air Fusion kayak, this represents the gold standard for tracking upgrades that maintain your manufacturer warranty.
The aluminum blade construction provides superior durability compared to plastic alternatives. Forum discussions from inflatable kayak enthusiasts consistently highlight how this skeg handles the demands of regular use without cracking or deformation. The two point five pound weight contributes to the robust feel and ensures the skeg remains stable at speed without vibrating or chattering in the water.
Installation for Air Fusion owners proves simpler than universal options since the kayak already includes mounting points designed to accept this skeg. The plug-and-play nature eliminates the need for drilling or extensive surface preparation. This is particularly valuable for inflatable owners who may be hesitant about making permanent modifications to their boats.
The twenty-inch length provides substantial tracking assistance for the Air Fusion's touring-oriented design. Paddlers upgrading from the standard skeg report noticeable improvements in straight-line stability, particularly when dealing with chop and wind. The premium construction justifies the higher price through years of reliable service and preserved tracking performance.
While the eighty-nine dollar price tag exceeds budget options, the specialized design and manufacturer backing make this a worthwhile investment for serious inflatable kayakers. The improved tracking transforms the Air Fusion from a capable recreational platform into a legitimate touring vessel capable of handling more challenging conditions with confidence.
Ideal for
Advanced Elements Air Fusion kayaks, inflatable touring applications, paddlers wanting manufacturer-backed quality
Consider instead if
You own a different inflatable brand, prefer budget options, want a universal mounting solution
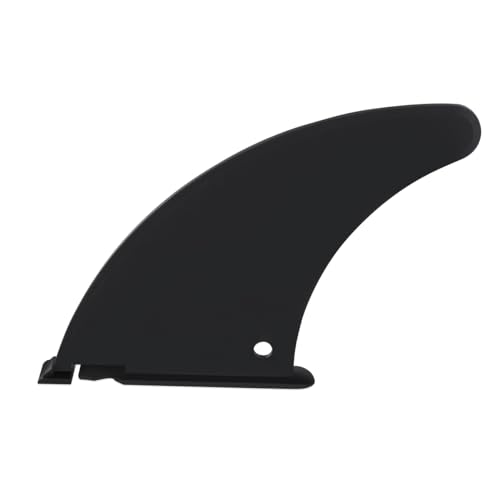
3. Ciuouient Skeg Replacement - Intex Challenger Excellence
Ciuouient 12181 Replacement Skeg Fin,Quick Install and Remove,1Pc
Material: Plastic
Weight: 0.12 kg
Fits: Intex K1/K2/Explorer K2
+ Pros
- Perfect fit for Intex models
- Plug and play installation
- One year warranty
- Lightweight design
- Cons
- Limited compatibility
- Plastic construction
- Basic feature set
The Ciuouient Skeg Replacement delivers exactly what Intex Challenger and Explorer kayak owners need - a direct replacement skeg that restores factory-level tracking to these popular budget inflatable platforms. The precision fit ensures proper water flow and maximum effectiveness without the guesswork involved with universal mounting solutions. This is the skeg to buy when your original skeg sustains damage from rock strikes or normal wear.
I have recommended this skeg to several paddlers with Intex kayaks who were frustrated by poor tracking after their original skegs broke. The transformation is consistently impressive - these kayaks were designed with a skeg in mind, and running without one significantly compromises their handling. The Ciuouient replacement restores the intended paddling experience at a fraction of the cost of a new kayak.
The plug-and-play installation requires no tools or adhesive. Simply remove the damaged skeg and insert the replacement - the form factor matches the original equipment precisely. The lightweight construction at zero point one two kilograms adds negligible weight while providing meaningful tracking assistance. An included one-year warranty provides peace of mind against manufacturing defects.

The four point five star rating from thirty verified purchasers indicates strong satisfaction with this replacement option. Negative reviews typically involve ordering the wrong model for their specific kayak, underscoring the importance of confirming compatibility before purchase. For Intex Challenger K1, Challenger K2, Explorer K2, and Excursion Pro kayaks, this skeg represents the ideal solution.
Ideal for
Intex Challenger K1/K2 owners, Intex Explorer K2 users, replacement of damaged original skegs, budget inflatable kayakers
Consider instead if
You own a different kayak brand, want adjustable tracking, need universal mounting options
4. OUKENS Paddle Board Fin - Versatile SUP Option
OUKENS Paddle Board Fin, Plastic Detachable Stand Up Surf Fin, Quick Release Slide on Center Fin...
Material: Plastic
Weight: 260 grams
Height: 2-4 inches adjustable
+ Pros
- Multiple height positions
- Quick-release system
- Universal SUP compatibility
- Easy installation
- Cons
- Designed for SUP primarily
- May require modification for kayaks
- Limited kayak-specific features
The OUKENS Paddle Board Fin blurs the lines between traditional kayak and stand-up paddleboard accessories, offering a versatile tracking solution that works well for certain kayak applications. While designed primarily for SUP boards with standard fin boxes, creative paddlers have adapted this fin for use on kayaks equipped with compatible mounting systems. The quick-release mechanism and adjustable height make it particularly appealing for paddlers who want flexibility in their tracking setup.
The reinforced polymer construction provides durability competitive with dedicated kayak skegs while maintaining the light weight characteristic of SUP accessories. At two hundred sixty grams, this fin adds minimal weight to your vessel while contributing meaningful tracking assistance. The three-position height adjustment allows you to tune the amount of directional stability based on conditions - lower for calm water maneuvering, higher for challenging wind scenarios.
The quick-release slide-on system enables tool-free installation and removal, a feature that appeals to paddlers who frequently transport their kayaks or switch between different tracking configurations. If you use your kayak for multiple activities or want the option to remove the skeg for certain outings, this design provides that flexibility without requiring permanent modification.
Sixty-six customer reviews with a four point five star rating indicate strong performance and reliability. The universal SUP fitment means this works best for kayaks with compatible fin boxes or for paddlers comfortable with creative mounting solutions. For dedicated kayak tracking applications, consider whether your kayak's mounting system is compatible before purchasing. When properly mounted, the adjustable height and tool-free removal provide a level of versatility that fixed skegs cannot match.
Ideal for
SUP boards, kayaks with standard fin boxes, paddlers wanting adjustable tracking, multi-sport enthusiasts
Consider instead if
You need permanent mounting, own a kayak without fin box system, want maximum tracking surface area
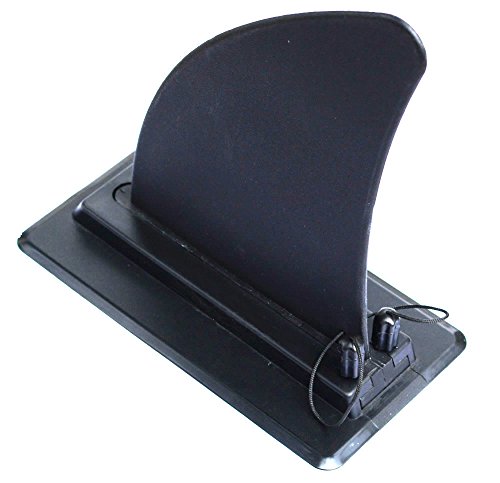
5. DSHE Detachable Center Fin - Universal Tracking Solution
DSHE Detachable Center Fin Black, Kayak Rudder Kit Skeg Tracking Fin Watershed Board for Inflatable...
Material: Fiberglass nylon
Weight: 0.1 lbs
Universal SUP/kayak fit
+ Pros
- Fiberglass-reinforced construction
- Tool-free removal
- Universal compatibility
- High customer satisfaction
- Cons
- May require adapter for some kayaks
- Detachable design adds complexity
- Universal fit less precise than brand-specific options
The DSHE Detachable Center Fin earns our Editor's Choice recommendation as the most versatile tracking solution among available aftermarket options. The fiberglass-reinforced nylon composite construction provides an excellent balance of durability, weight, and tracking performance. This fin works across multiple watercraft types - inflatable canoes, SUP boards, surfboards, and kayaks with compatible mounting systems - making it ideal for paddlers with diverse fleets or those who frequently switch between vessels.
The two hundred ninety-four customer reviews with a four point four star rating reflect consistent performance across a wide range of applications. Forum discussions highlight how this fin has rescued tracking-challenged kayaks from becoming wall decorations. Paddlers appreciate the tool-free removal system that allows quick changes for different conditions or storage requirements.
The classic design emphasizes flat water performance and straight-line tracking rather than aggressive turning response. This makes the DSHE fin particularly well-suited for touring applications where the goal is efficient paddling over long distances. The moderate size provides meaningful tracking assistance without drastically reducing maneuverability, allowing you to navigate obstacles and execute turns when needed.
At just zero point one pounds, this is one of the lightest tracking options available. The minimal weight penalty makes it attractive for paddlers conscious of their vessel's total weight, such as those who car-top their kayaks or pursue lightweight touring setups. Despite the light weight, the fiberglass reinforcement ensures the fin maintains its shape under load and resists the deformation that plague pure plastic alternatives.
The universal fitment does mean some adaptation may be required depending on your specific kayak's mounting system. Most users report straightforward installation, but the occasional adapter or slight modification may be necessary for non-standard configurations. For paddlers seeking one fin that works across multiple boats or as an introduction to tracking solutions, the DSHE Detachable Center Fin delivers reliable performance at an accessible price.
Ideal for
Multi-boat households, SUP to kayak crossover, touring kayaks, paddlers wanting adjustable tracking
Consider instead if
You need exact brand-matched fitment, prefer permanent installation, only use one kayak type
Essential Tools and Materials for Skeg Installation
Successful skeg installation requires proper preparation and the right materials. Before beginning your project, gather everything needed to ensure a smooth process without interruptions. The investment in quality materials pays dividends through years of reliable service from your tracking fin.
Required Materials:
- Marine-grade adhesive (3M 5200, Marine Goop, G-Flex epoxy, or HH66 cement)
- 80-grit sandpaper
- Isopropyl alcohol or acetone
- Clean rags or paper towels
- Masking tape (optional)
Optional but Helpful Tools:
- Heat gun or hair dryer
- Drill with small bits (for safety leash)
- Paddle leash or cord
- Weighted object for pressure during curing
Marine adhesive selection significantly impacts installation longevity. For polyethylene hulls, 3M 5200 provides exceptional bond strength and flexibility but requires careful surface preparation. Marine Goop offers easier application with good water resistance, making it popular among DIY installers. G-Flex epoxy excels for both polyethylene and fiberglass hulls, providing superior adhesion even to difficult surfaces. HH66 cement works well for PVC and inflatable materials, creating a fast-setting flexible bond.
Step-by-Step Installation Guide
Step 1: Locate the Ideal Mounting Position
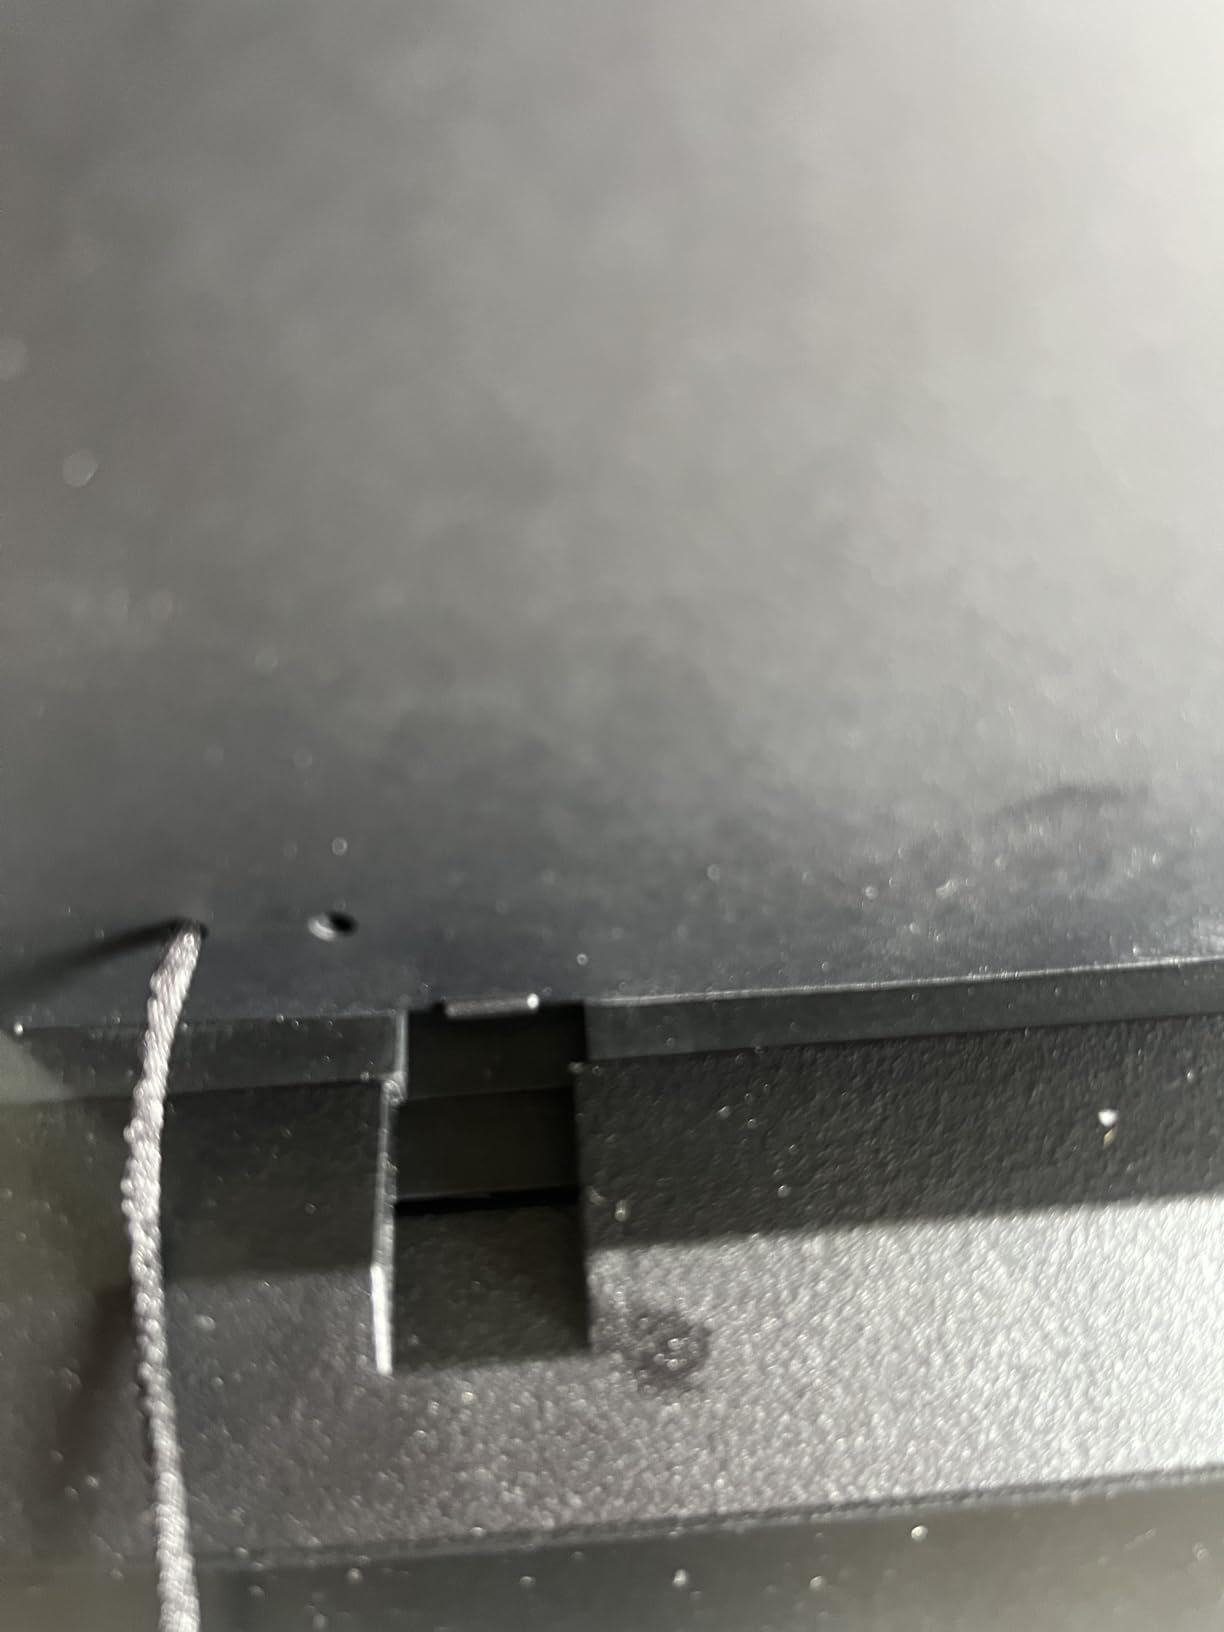
Turn your kayak upside down on sawhorses or a flat protected surface. The optimal location for skeg mounting sits along the centerline, approximately twelve to eighteen inches forward of the stern. This positioning provides effective tracking leverage without creating excessive drag or interfering with paddling technique.
Mark the intended location with pencil or masking tape. Consider your kayak's hull shape - V-hulls may require slight adjustment compared to flat-bottom designs. Test-fit the skeg before applying adhesive to ensure it sits flush against the hull and aligns properly with the centerline. Small adjustments now prevent problems later.
Step 2: Prepare the Mounting Surface
Surface preparation determines installation success more than any other factor. Using eighty-grit sandpaper, thoroughly roughen the mounting area. This creates texture that allows adhesive to bond mechanically with the hull material rather than simply adhering to the smooth surface. Sand an area slightly larger than the skeg base to ensure complete coverage.
Remove all sanding dust with a clean, dry cloth. Follow with isopropyl alcohol or acetone on a fresh rag to degrease the surface completely. This step ensures maximum adhesive bonding by removing oils, release agents, and contaminants that could compromise the bond. Allow the surface to dry entirely before proceeding - patience here prevents adhesion failures later.
Step 3: Apply Heat (For Polyethylene Hulls)
Polyethylene kayaks benefit from gentle heating before adhesive application. Using a heat gun or hair dryer, warm the mounting area for thirty to sixty seconds until the plastic feels warm but not hot to touch. This softens the surface slightly and allows adhesive to penetrate more deeply into the material, creating a stronger long-term bond.
Skip this step for fiberglass or composite kayaks, as these materials do not respond to heat treatment the same way. For inflatable PVC kayaks, ensure the surface is clean and dry but do not apply heat, as excessive temperature can damage the material.
Step 4: Apply Marine Adhesive
Apply a generous bead of marine adhesive to the skeg mounting base. Create a continuous seal around the edges with additional adhesive in the center. Do not skimp on coverage - proper adhesive thickness prevents water intrusion and ensures the bond can withstand hull flexing during use. Some installers prefer applying adhesive to both the skeg and hull before joining them.
If applying to both surfaces, work quickly since repositioning becomes difficult once the adhesive-covered surfaces touch. The specific adhesive chosen affects open time - 3M 5200 allows slightly more working time than faster-setting options like HH66 cement. Follow manufacturer recommendations for your specific adhesive.
Step 5: Mount and Secure the Skeg
Press the skeg firmly onto the prepared surface, applying steady pressure for thirty seconds to ensure full contact across the entire mounting base. Use a slight twisting motion while pressing to spread adhesive evenly beneath the base and eliminate any air pockets or dry spots.
Place a weighted object on the skeg to maintain pressure during curing. A gallon water jug filled with water works perfectly - the weight provides consistent pressure while being easy to position. Check manufacturer specifications for required cure time - many marine adhesives need twenty-four to forty-eight hours for full strength development before water exposure.
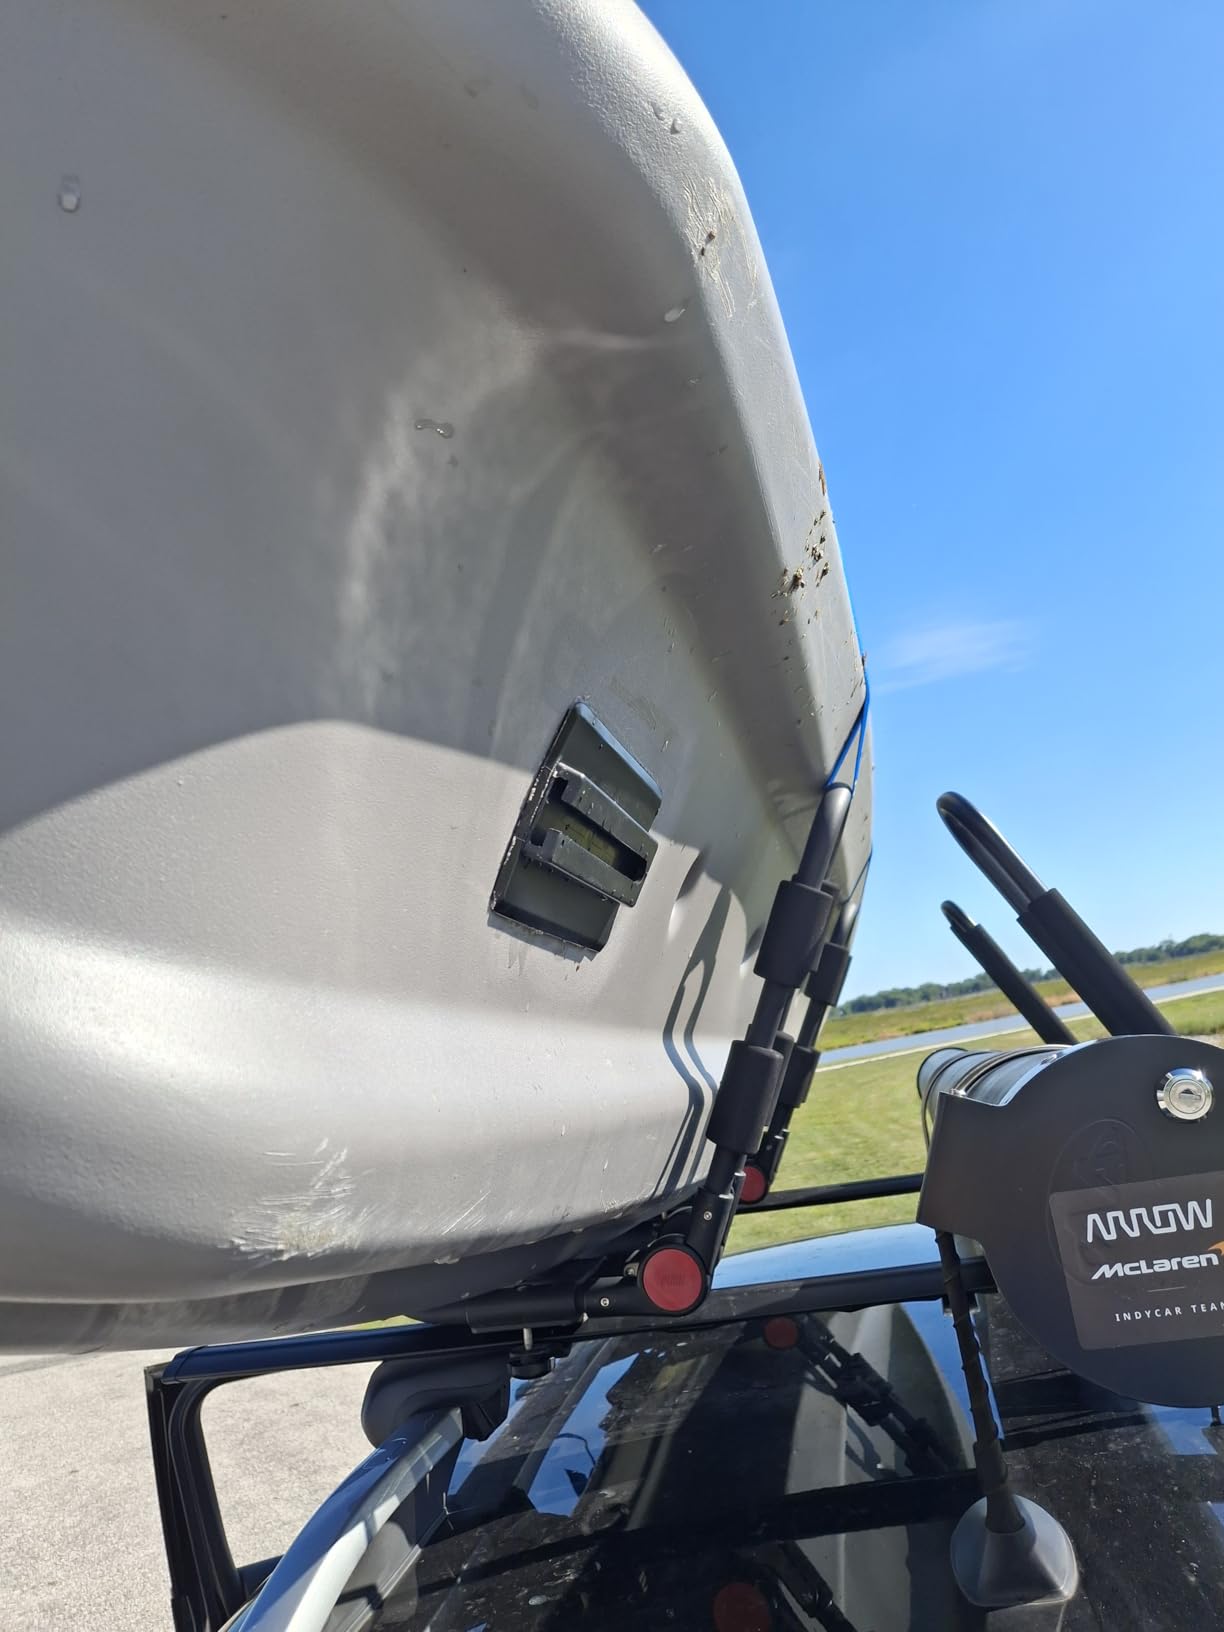
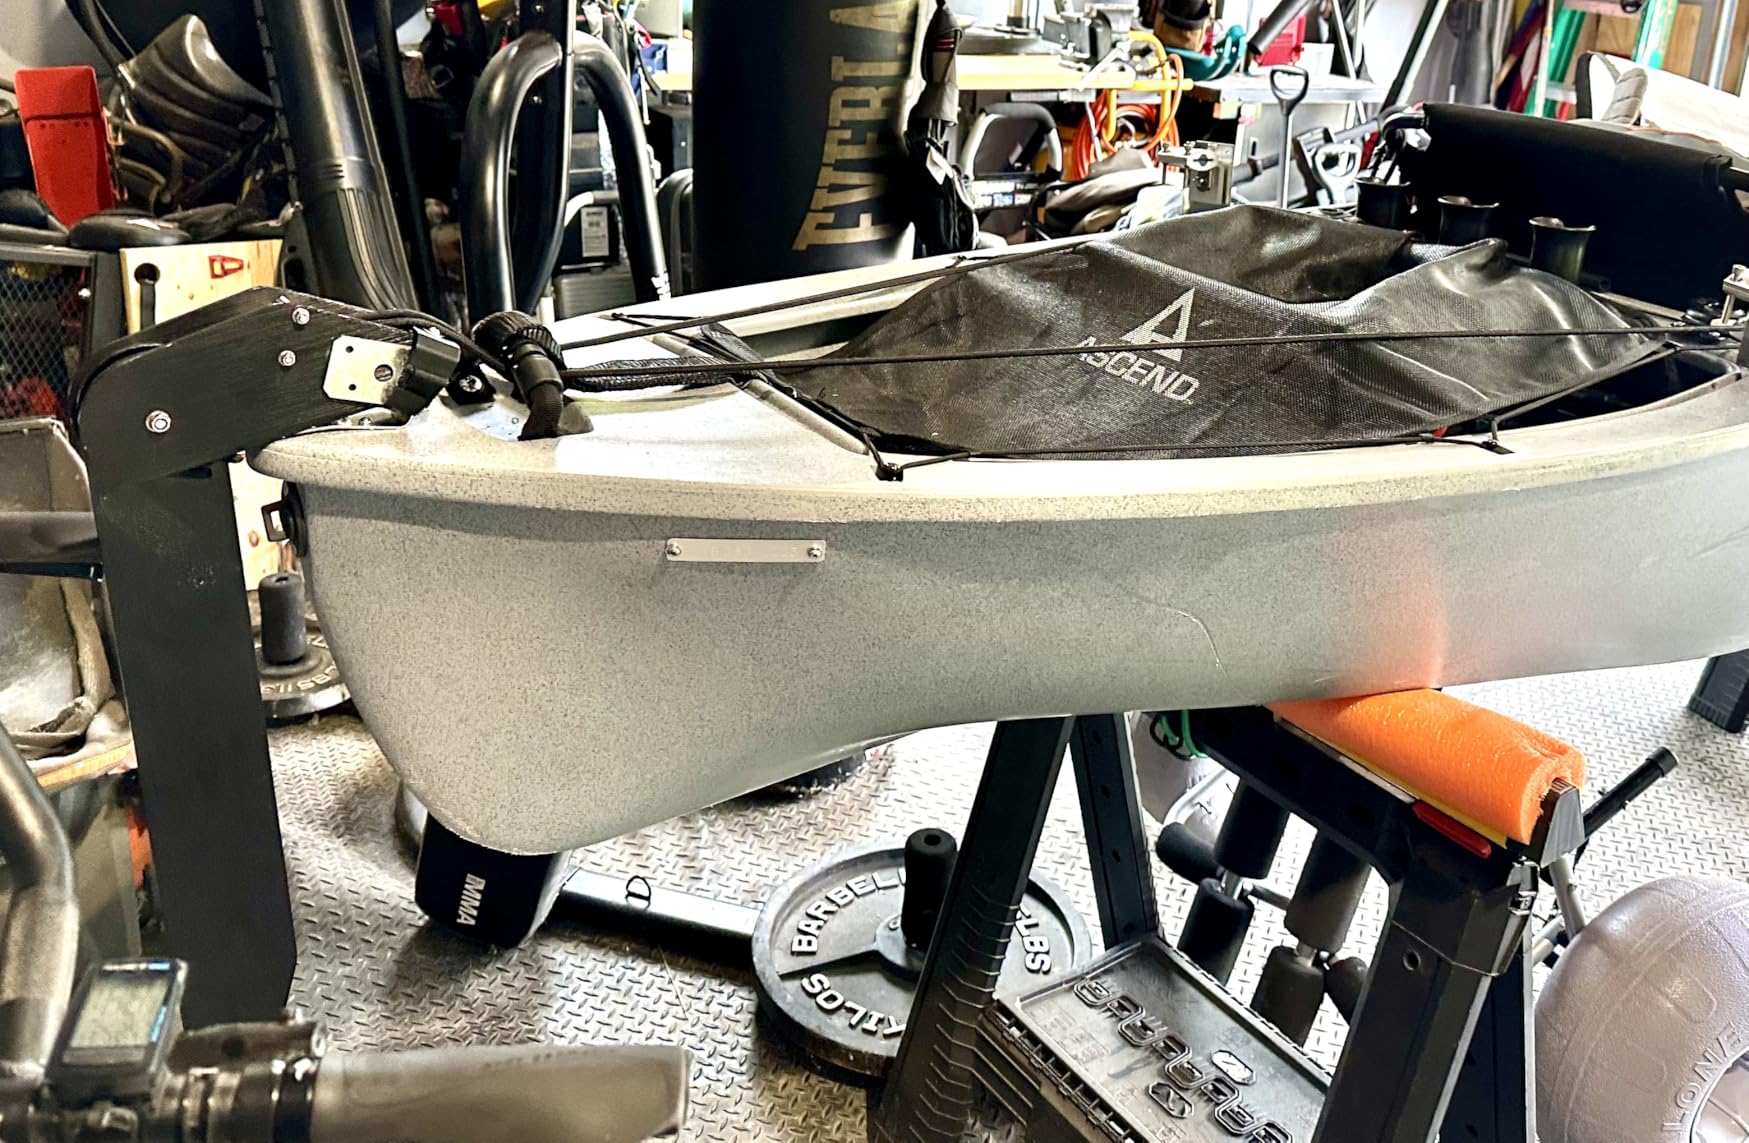
Step 6: Install Safety Leash (Optional)
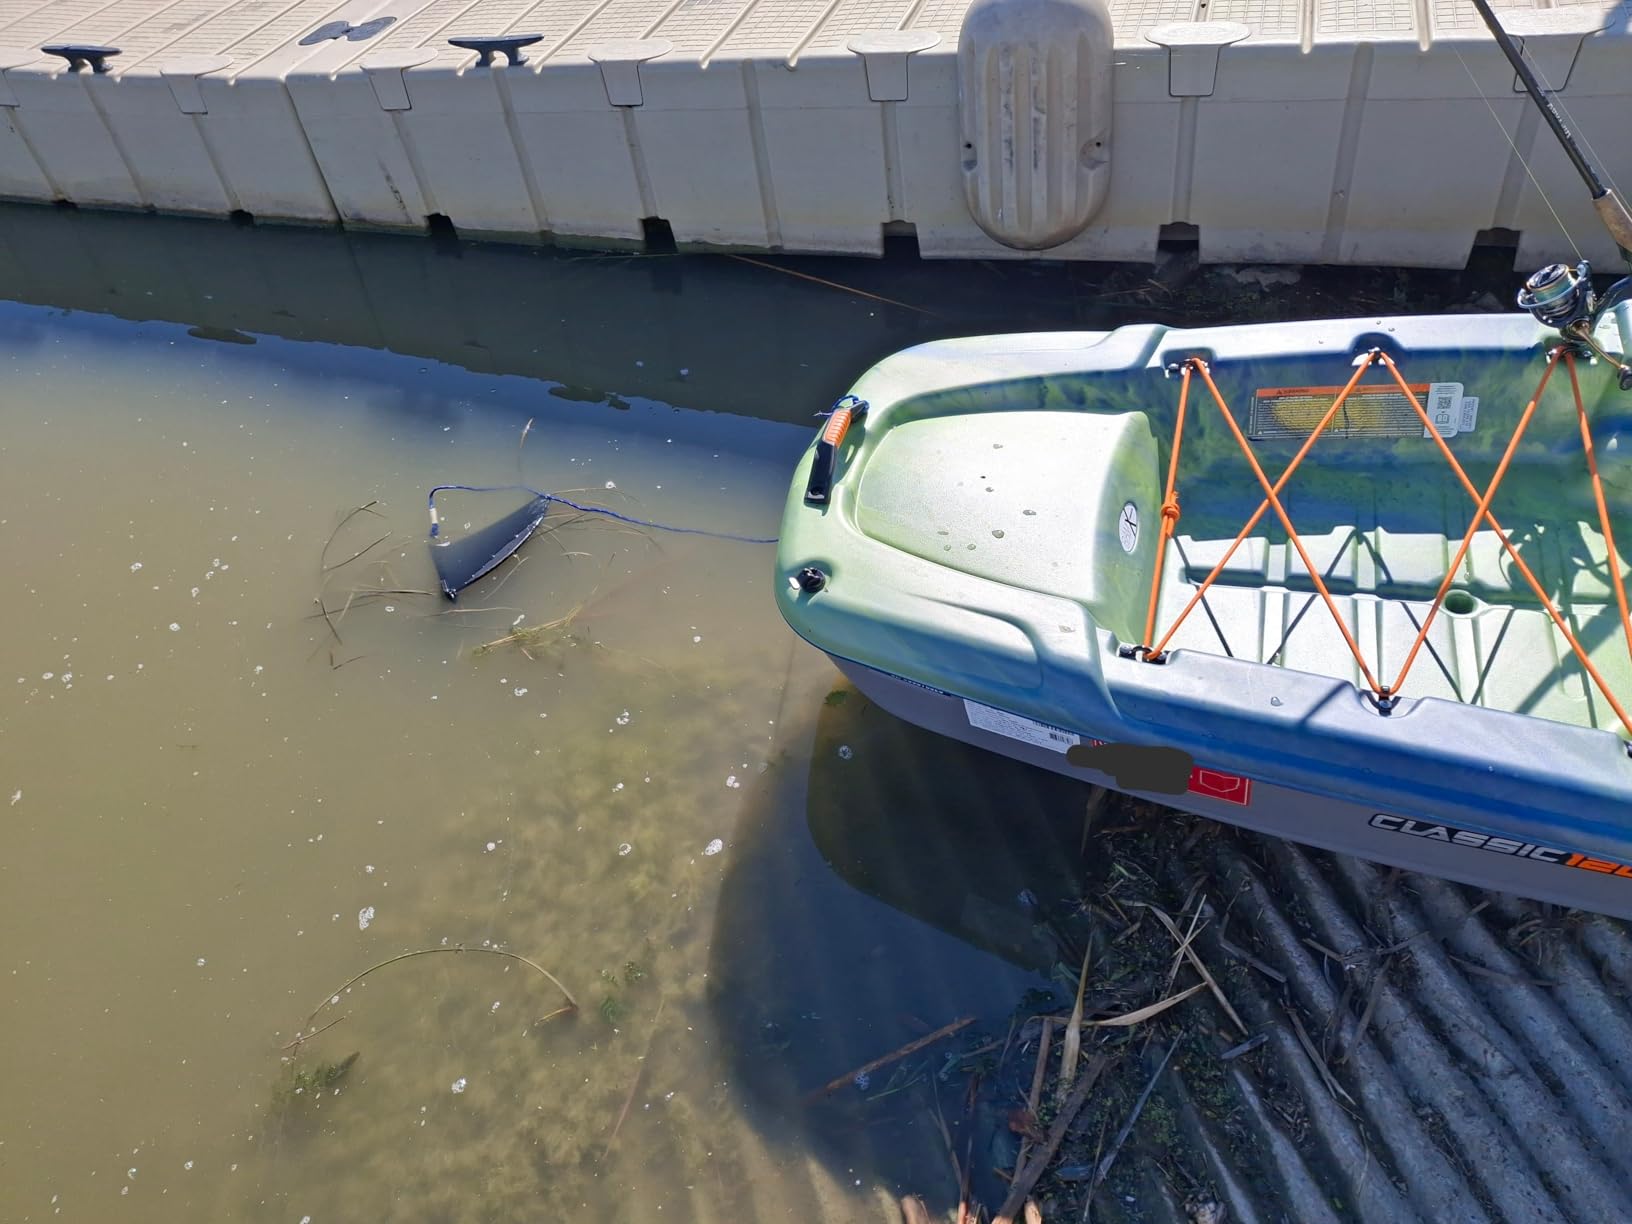
For removable skegs, adding a safety leash prevents loss if the skeg detaches from impacts. Drill a small hole through the fin's trailing edge, thread a paddle leash or strong cord through, and secure the other end to the kayak's stern handle or deck line. This is especially valuable for paddlers exploring rocky areas or shallow rivers where bottom contact is likely.
Special Considerations for Pelican Kayak Skeg Installation
Pelican kayaks often feature unique hull designs requiring special attention during skeg installation. Many Pelican models include pre-molded channels or mounting points designed for OEM skeg systems. Before purchasing an aftermarket tracking fin, check whether your Pelican kayak includes these features - using the existing mounting system simplifies installation significantly.
Some Pelican models feature twin-hull designs that affect skeg placement. The pronounced keel line on models like the Pelican Catch series may require offset mounting to ensure proper water flow around the skeg. Test-fitting before adhesive application reveals any alignment issues. The kayak selection guide offers additional context on matching tracking solutions to specific kayak designs.
For older Pelican kayaks where OEM replacement parts are unavailable, universal aftermarket skegs work well when properly installed. Match skeg size to kayak length - shorter recreational kayaks need smaller skegs to maintain maneuverability. A skeg that is too large can make the kayak feel sluggish and resistant to turning.
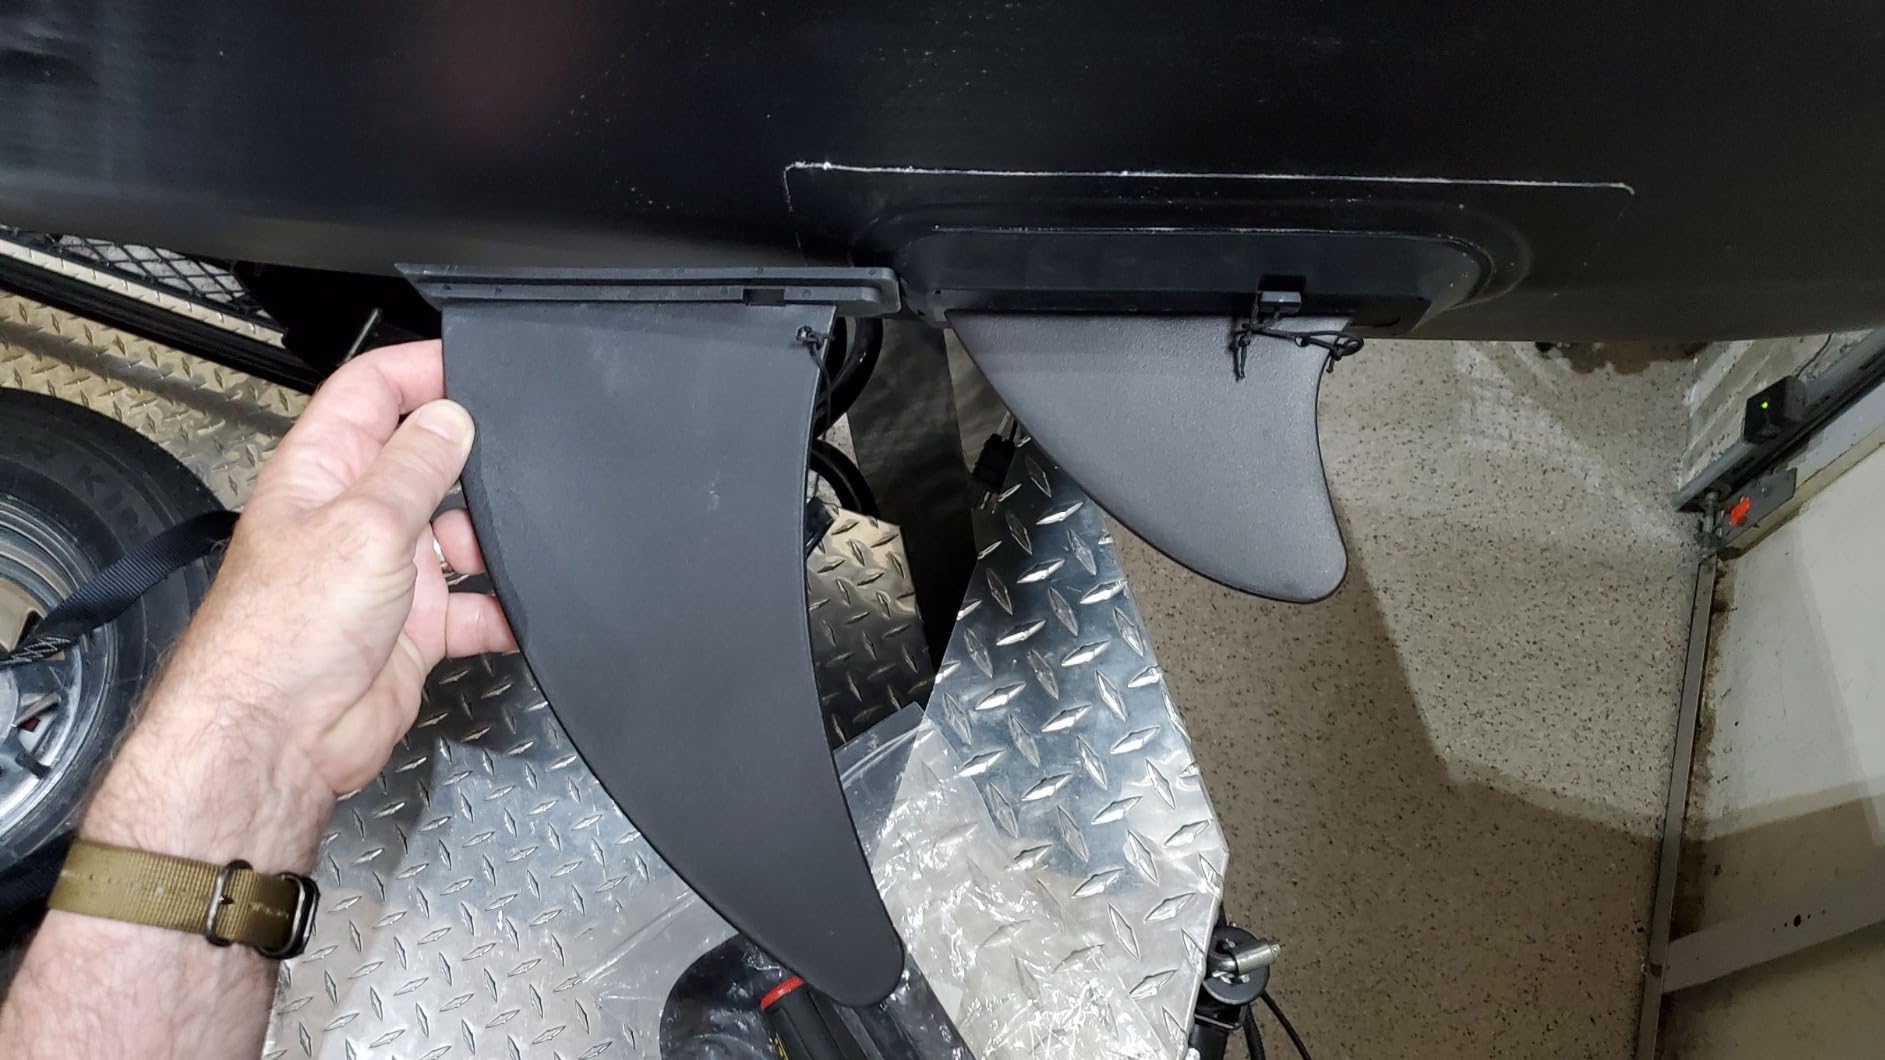
Installing Skegs on Inflatable Kayaks
Inflatable kayaks present unique challenges for skeg installation compared to rigid hulls. Many modern inflatable models include built-in mounting points or fin boxes designed for tool-free skeg attachment using included hardware. If your inflatable has these features, use the manufacturer-supplied system for the most reliable results.
For inflatables without mounting points, specialized adhesive patches provide secure attachment surfaces. These patches bond to the kayak's fabric, creating a mounting platform for standard skegs. Ensure the adhesive is compatible with your kayak's material - PVC inflatable kayaks require different products than those made from Hypalon or other materials.
Some manufacturers offer inflatable-specific skegs with wider mounting bases that distribute stress across larger areas, reducing potential fabric damage. HH66 cement is particularly popular for PVC inflatable skeg installations, providing a flexible bond that accommodates the material's movement without cracking. Always follow manufacturer guidelines for modifications to avoid voiding warranties.
Troubleshooting Common Installation Issues
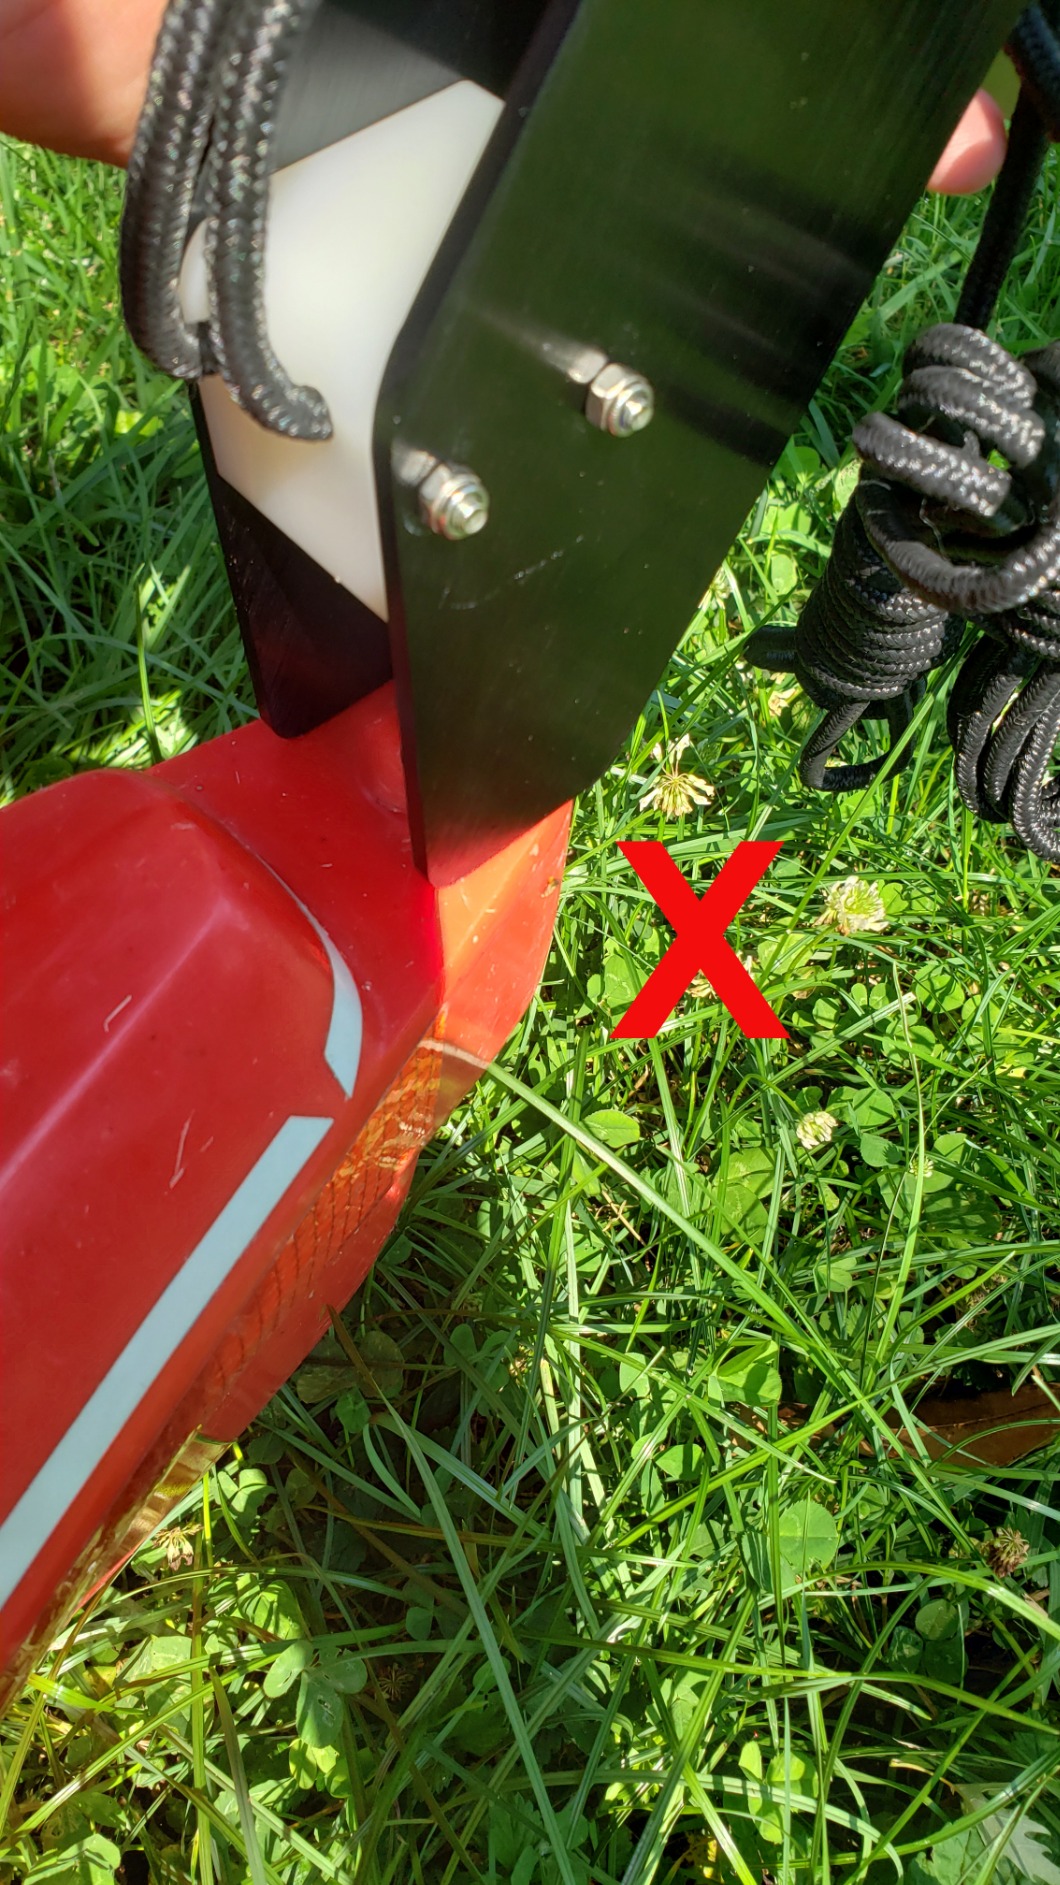
Problem: Skeg Won't Stay Attached Poor surface preparation usually causes adhesion failure. Remove the skeg completely, clean all old adhesive residue, and restart with thorough sanding and degreasing. Consider using a primer designed for difficult-to-bond plastics, or switch to an adhesive specifically formulated for your hull material like G-Flex epoxy for polyethylene.
Problem: Skeg Creates Excessive Drag Oversized skegs can significantly slow your kayak. As a general rule, skeg length should not exceed ten percent of your kayak's waterline length. If your kayak tracks well but feels sluggish, try a smaller skeg. Recreational kayaks under twelve feet typically need only two to three inch fins.
Problem: Tracking Hasn't Improved Verify proper placement along the centerline - skegs mounted off-center create asymmetric drag that actually worsens tracking. Also ensure the skeg is positioned close enough to the stern - those mounted too far forward cannot effectively counter weather-cocking forces. Consider moving the installation point closer to the stern if results disappoint.
Maintenance and Care Tips
Regular maintenance extends your skeg's service life and ensures continued performance. After each use, rinse with fresh water to remove salt and debris. Salt crystals and grit can accelerate adhesive degradation and cause galvanic corrosion if metal hardware is present. Thorough drying before storage prevents moisture-related issues.
Periodically inspect the mounting for signs of loosening or damage. Small cracks in the adhesive seal can be repaired with additional marine sealant before they lead to water intrusion and complete failure. Replace worn or damaged skegs promptly to avoid hull damage from continued use with a compromised tracking device.
Store kayaks with fixed skegs carefully to prevent impact damage during transport. Use pool noodles or foam blocks to protect the skeg from accidental bumps. Consider removing detachable skegs for long-term storage or during kayak stacking situations where multiple boats contact each other.
Safety Considerations When Paddling with a Skeg
Adding a skeg changes your kayak's handling characteristics. Practice in calm conditions before tackling challenging waters. The improved tracking means wider turning radius - plan accordingly when navigating tight spaces, narrow channels, or crowded launch areas. You cannot pivot as sharply with a deployed skeg as you could without one.
Be aware of reduced clearance when launching, landing, or navigating shallow areas. Skegs catch on rocks, sand, and submerged obstacles potentially causing sudden stops or falls. Approach shores at angles that minimize bottom contact, and be prepared to lift your kayak over obstacles rather than dragging it through shallow water.
If you practice kayak rolling techniques, note that fixed skegs may affect roll timing and require adjustment. The changed hull dynamics alter how the kayak responds during the setup and execution phases of rolls. Practice in controlled environments with spotter supervision before relying on your roll in challenging situations with a newly installed skeg.
Professional Installation vs. DIY
While most paddlers successfully install their own skegs, professional installation offers certain advantages. Marine shops and kayak dealerships ensure proper adhesive selection for your specific hull material and apply techniques refined through many installations. They typically warranty their work against failure, providing recourse if problems develop.
Professional installation typically costs fifty to one hundred fifty dollars including materials. This makes sense for expensive kayaks where mistakes are costly, or for paddlers uncomfortable with DIY projects. Some shops offer mobile services, bringing professional installation to your location for added convenience.
DIY installation provides cost savings and personal satisfaction. With proper preparation and patience, results can match professional quality at a fraction of the cost. The knowledge gained through the process deepens your understanding of your kayak's construction, valuable information for future maintenance and modifications.
Performance Improvements You Can Expect
After adding a skeg to kayak, most paddlers notice immediate improvements in straight-line tracking. Corrective stroke frequency typically reduces by fifty to seventy percent in crosswind conditions. This translates directly to reduced fatigue and greater paddling distances without the burnout that comes from constant course correction.
Speed improvements are subtle but measurable over longer distances. By eliminating the zigzag pattern caused by weather-cocking, skegs help maintain momentum and efficiency. Touring paddlers often report ten to fifteen percent increases in average speeds over multi-hour excursions, valuable for anyone covering significant distances.
The psychological benefits deserve recognition as well. Confident tracking allows focus on scenery, wildlife observation, and paddling enjoyment rather than constant battle with wind. This enhanced experience makes solo kayaking adventures more appealing and group paddles more enjoyable when skill levels vary within the party.
Choosing the Right Size Skeg
Skeg sizing directly impacts both performance and handling characteristics. Larger skegs provide more tracking assistance but increase drag and reduce maneuverability. Finding the optimal size requires balancing these competing factors based on your specific kayak and typical conditions.
Kayak Length Guidelines:
- Under 12 feet: 2-3 inch skegs
- 12-14 feet: 3-4 inch skegs
- 14-16 feet: 4-6 inch skegs
- Over 16 feet: 6-8 inch skegs
These recommendations assume average paddling conditions with moderate wind exposure. Increase skeg size for consistent strong winds, heavy gear loads, or when paddling fully loaded touring setups. Decrease size for primarily calm water use or when maneuverability matters more than straight-line tracking.
Common Mistakes to Avoid
Rushing the Process: Proper installation takes time. Rushing leads to poor adhesion, misalignment, or inadequate curing. Plan the project when you have several uninterrupted hours available for the installation plus appropriate cure time before water exposure. Many adhesion failures trace directly to insufficient curing periods.
Ignoring Manufacturer Instructions: Each adhesive has specific requirements for temperature, humidity, and cure time that must be followed precisely. Marine Goop behaves differently than 3M 5200, which differs from G-Flex epoxy. Do not assume all marine adhesives work identically - read and follow the specific instructions for your chosen product.
Mounting Oversized Accessories: While skegs improve tracking, resist the temptation to add multiple fins or oversized options. Excessive drag negates benefits and can make paddling more difficult than without any tracking device. One properly sized skeg provides optimal performance for most conditions.
Alternative Tracking Solutions
Before committing to skeg installation, consider alternatives that might address your tracking issues more effectively:
Improved Paddling Technique: Many tracking problems stem from inefficient stroke mechanics. Taking a kayaking technique course can dramatically improve boat control without any modifications. An instructor can identify specific issues in your paddling style that contribute to tracking difficulties.
Weight Distribution Adjustments: Proper gear loading significantly affects tracking characteristics. Heavy items at the ends increase weather-cocking tendencies while balanced loading promotes straighter tracking. Experiment with gear placement to achieve optimal trim before adding hardware modifications.
Rudder Systems: For maximum control flexibility, rudder systems offer superior versatility compared to skegs. However, they require more complex installation and ongoing maintenance. If you frequently navigate highly variable conditions or need fine-tuned control, review our kayak rudder vs skeg comparison to make an informed decision.
Frequently Asked Questions
Can you add a skeg to a kayak?
Yes, you can add a skeg to virtually any kayak using marine-grade adhesive. The process involves locating the ideal mounting position along the centerline near the stern, preparing the surface by sanding and cleaning, applying appropriate adhesive like 3M 5200 or Marine Goop, and allowing proper cure time before water exposure. Most DIY installations take under an hour plus curing time.
What are the pros and cons of a skeg?
Pros include improved directional stability, reduced fatigue from corrective strokes, better tracking in crosswinds, and simple passive operation with no moving parts. Cons include reduced maneuverability, potential bottom contact issues in shallow water, inability to adjust tracking assistance on fixed models, and permanent modification to the hull for fixed installations.
Can I add multiple skegs to my kayak?
While technically possible, adding multiple skegs creates excessive drag without proportional tracking improvement. One properly sized skeg provides optimal performance for most conditions. Forum discussions indicate multiple small skegs rarely outperform a single correctly-sized tracking fin.
Will adding a skeg damage my kayak's warranty?
Most manufacturers void warranties for hull modifications including skeg installation. Check your specific warranty terms before proceeding. Professional installation may minimize warranty concerns since shops typically warranty their work separately.
How long do aftermarket skegs typically last?
Quality skegs last five to ten years with proper care including regular rinsing, inspection for damage, and proper storage. UV exposure, impacts, and adhesive degradation eventually require replacement. Regular inspection identifies issues before they cause failure.
Can I remove a permanently mounted skeg later?
Yes, but removal requires careful work to avoid hull damage. Heat softens most marine adhesives for removal. Expect to sand and refinish the mounting area afterward. Adhesive residue removal takes time but does not typically damage the hull itself.
Do skegs work on whitewater kayaks?
Skegs are not recommended for whitewater use. They reduce maneuverability and catch on rocks, creating dangerous situations. Whitewater kayaks rely on hull design and edging for directional control in rapid environments.
What's the difference between a skeg and a fin?
Functionally they are similar - both are fixed blade appendages providing directional stability. Skeg typically refers to kayak applications while fin is common for paddleboards and surfboards. Kayak skegs tend to be larger and more robust than typical SUP fins.
Expert Tips for Maximum Performance
Optimize your skeg effectiveness with professional insights from experienced paddlers:
Fine-Tune the Position: Small placement adjustments significantly impact performance. If initial results disappoint, try moving slightly forward or aft before assuming the skeg is too small. The ideal position varies based on hull shape and weight distribution.
Match Conditions: Calm lake paddling requires minimal tracking assistance while ocean touring demands maximum skeg deployment. Consider owning multiple skeg sizes for different conditions, or choose an adjustable retractable system if your conditions vary significantly.
Combine with Proper Storage: Protect your investment with appropriate kayak storage solutions. Improper support can cause hull deformation that affects skeg alignment, leading to tracking problems even with a properly installed fin. Use appropriate kayak storage racks for long-term protection.
Environmental Considerations
Responsible skeg use includes environmental awareness. In shallow ecosystems, skegs can damage sensitive bottom habitats when you glide over vegetation or substrate. Retract or remove skegs when exploring these sensitive areas to minimize environmental impact.
Some marine adhesives contain compounds harmful to aquatic life if they leach into water. Choose eco-friendly options when available and ensure proper cure time before water exposure. Dispose of sanding dust and adhesive containers responsibly to protect waterways from contamination.
Consider how skegs affect wildlife interactions during your paddling adventures. Fixed fins may startle fish or interfere with underwater photography sessions. Balance your performance needs with environmental responsibility to minimize your footprint on the ecosystems you enjoy.
The Bottom Line on Adding Skegs
Adding a skeg to kayak transforms the paddling experience for anyone who has struggled with wind and tracking issues. The modest investment of twenty to one hundred dollars in an aftermarket tracking fin yields significant returns in comfort, efficiency, and enjoyment on the water. Whether you choose an affordable PVC option like the Alemon or a premium aluminum system like the Advanced Elements Airfusion, proper installation ensures years of improved performance.
Start with careful planning and quality materials. Take time for thorough surface preparation - this single step prevents most installation failures. Follow manufacturer instructions precisely for your chosen adhesive, whether that is 3M 5200, Marine Goop, G-Flex epoxy, or HH66 cement. With attention to detail, your DIY skeg installation will rival professional results at a fraction of the cost.
Most importantly, get out and enjoy your newly enhanced kayak. The improved tracking opens new possibilities for longer trips, challenging conditions, and more confident paddling in wind. Your upgraded vessel stands ready for whatever adventures await on the water. The time invested in proper installation pays dividends with every stroke you take straighter and more efficiently than before.